Tri Tip Two Ways Perfect Steak Recipes
Tri Tip, that magnificent cut of beef, holds a special place in the hearts of grill masters and home cooks alike. Its incredible flavor, tender texture, and relative affordability make it a go-to for gatherings and weeknight dinners. But what if I told you this already fantastic Tri Tip could be elevated even further? Today, we’re diving into the delicious world of Tri Tip, exploring not just one, but two exciting ways to prepare this crowd-pleasing favorite. You see, the beauty of a Tri Tip roast is its versatility, allowing it to absorb marinades and rubs like a dream, leading to wildly different yet equally satisfying flavor profiles. Whether you crave smoky, herbaceous notes or a bold, spicy kick, this recipe will unlock new dimensions for your Tri Tip experience, ensuring your next barbecue is truly unforgettable.
Get Ready for the Best Tri Tip You’ve Ever Had!
Tri Tip (2 Ways)
Tri tip. Just the name conjures up images of a perfectly seared, juicy, and flavorful cut of beef. This triangular-shaped roast, often found at the bottom sirloin of the cow, is a true gem for any home cook. It’s incredibly versatile, taking beautifully to a variety of marinades and cooking methods. Today, I’m going to show you my two favorite ways to prepare a tri tip roast, ensuring a restaurant-quality result every time. We’ll cover a classic, bold rub and then a slightly more nuanced approach that brings out even more complexity.
Ingredients:
Method 1: The Bold & Beautiful Rub
This first method is all about building a fantastic crust with a robust flavor profile. It’s straightforward and delivers incredible results, perfect for grilling or a hot oven sear.
Step 1: Prepare the Roast and the Rub
Begin extract by patting your tri tip roast completely dry with paper towels. This is a crucial step, as moisture on the surface will prevent a good sear. In a small bowl, combine the garlic salt, Lawry’s seasoning salt, kosher salt, black pepper, sugar, garlic powder, and parsley. This blend creates a wonderfully aromatic and savory rub that will adhere beautifully to the meat. The sugar, though a small amount, helps with caramelization and browning, adding another layer of flavor. Mix everything thoroughly to ensure an even distribution of spices.
Step 2: Season Generously
Now, it’s time to coat the tri tip. Drizzle the olive oil all over the roast, ensuring it’s lightly coated. This oil acts as a binder for the rub and also helps in achieving a beautiful, crispy exterior. Generously sprinkle the spice rub all over the roast, making sure to get all sides, including the edges. Don’t be shy with the rub; you want a good, thick coating. Gently press the rub into the meat with your hands to help it stick. Allow the seasoned roast to sit at room temperature for about 30-60 minutes before cooking. This allows the meat to come closer to an even temperature, promoting more uniform cooking.
Step 3: The Sear and Cook
For this method, I love to use a combination of searing and roasting. If grilling, preheat your grill to high heat. Sear the tri tip over direct heat for about 3-4 minutes per side, until a beautiful crust has formed. Then, move it to indirect heat and close the lid. If using an oven, preheat your oven to 400°F (200°C). In an oven-safe skillet or a cast-iron pan, heat a tablespoon of olive oil over high heat. Sear the tri tip for 3-4 minutes per side until a deep brown crust develops. Transfer the skillet to the preheated oven.
Step 4: Monitor Temperature for Perfection
This is where a good meat thermometer is your best friend. For medium-rare, aim for an internal temperature of 130-135°F (54-57°C). For medium, target 135-140°F (57-60°C). Cook time will vary depending on the thickness of the roast and your oven or grill, but generally, it will take about 20-30 minutes for this size roast after searing. Continue to cook, flipping occasionally if in the oven, until your desired internal temperature is reached.
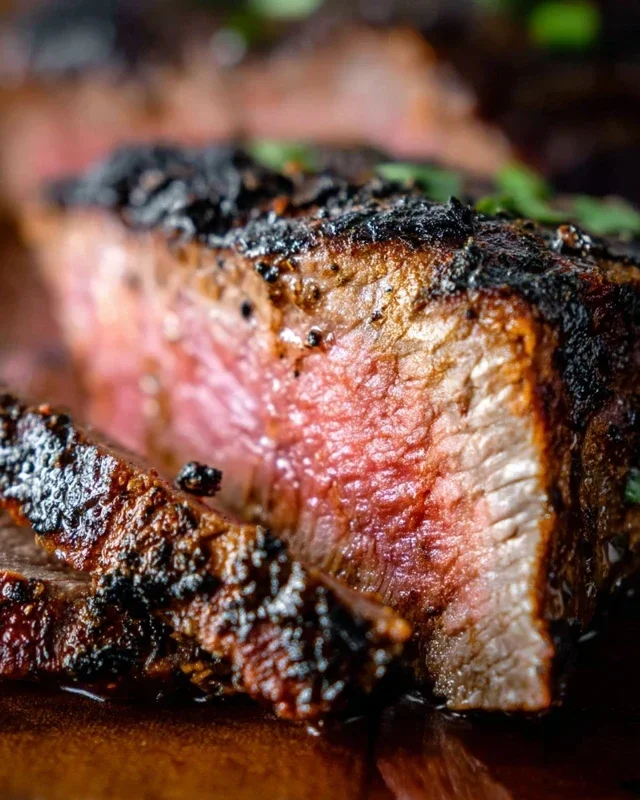
Step 5: Rest and Slice
Once the tri tip reaches your target temperature, remove it from the heat and place it on a cutting board. Tent it loosely with aluminum foil and let it rest for at least 10-15 minutes. This resting period is absolutely crucial. It allows the juices to redistribute throughout the meat, ensuring every slice is incredibly moist and tender. If you cut into it too soon, all those delicious juices will run out onto the board. After resting, slice the tri tip thinly against the grain. You’ll notice the beautiful pink interior and the irresistible crust.
Method 2: The Herbaceous Elegance
This second approach focuses on a slightly lighter, more herbaceous flavor profile, often enhanced by a marinade. While this recipe uses the same core ingredients for simplicity and versatility, imagin extracte adding fresh rosemary or thyme to this rub for an even more sophisticated taste.
This method can be adapted slightly. For a truly distinct flavor, you could create a marinade using a portion of the olive oil, a splash of red grape juice vinegar or lemon juice, and some fresh herbs like rosemary and thyme, then let the tri tip marinate for at least 2 hours, or preferably overnight. However, for this demonstration, we’ll stick to a dry rub that leans towards a fresher, brighter profile.
Step 1: Prepare the Roast and the Herbaceous Rub
Ensure your tri tip is dry. In a bowl, combine the garlic salt, Lawry’s seasoning salt, kosher salt, black pepper, sugar, garlic powder, and parsley. The key here is the generous amount of parsley, which will provide a lovely fresh element to the finished roast. Mix these ingredients thoroughly.
Step 2: Apply the Rub and Let it Mingle
Drizzle the tri tip with olive oil, coating it evenly. Then, generously apply the herb-forward rub, pressing it into the meat on all sides. Let the roast sit at room temperature for 30-60 minutes to allow the flavors to begin extract their work and the meat to temper.
Step 3: The High-Heat Blast
This method often benefits from a slightly different cooking approach, focusing on a high-heat sear to lock in moisture and develop a good crust, followed by a slightly lower temperature. Preheat your grill or oven to 450°F (230°C). If grilling, sear the tri tip over high, direct heat for 3-4 minutes per side. If using an oven, heat a cast-iron skillet with a tablespoon of olive oil over high heat and sear the roast for 3-4 minutes per side until beautifully browned.
Step 4: Controlled Cooking for Tenderness
After the initial sear, if on the grill, move the tri tip to indirect heat and close the lid. If in the oven, transfer the skillet to the preheated oven. Reduce the oven temperature to 375°F (190°C). Continue to cook, monitoring the internal temperature with a meat thermometer. Aim for 130-135°F (54-57°C) for medium-rare and 135-140°F (57-60°C) for medium. This temperature range is ideal for tri tip, as overcooking can quickly make it tough.
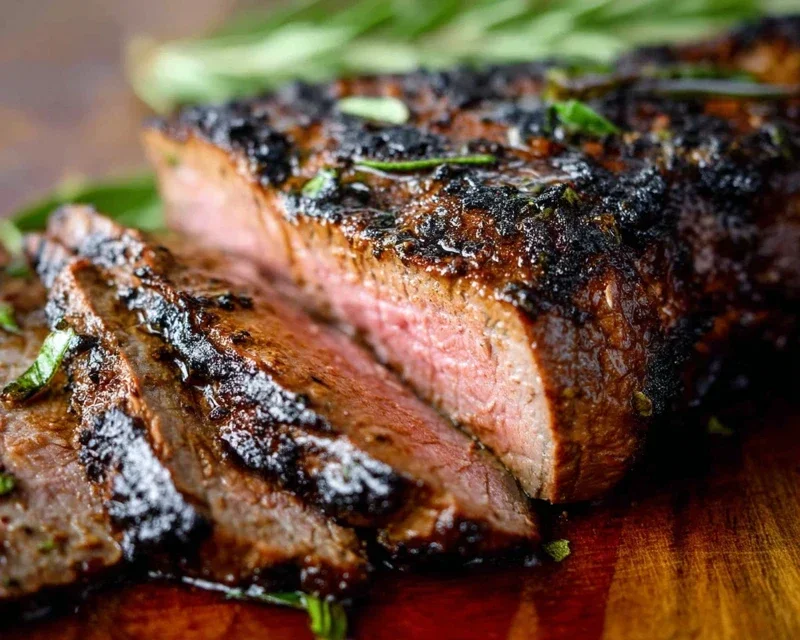
Step 5: The Essential Rest and Final Slice
Just as in the first method, the rest is paramount. Remove the tri tip from the heat and let it rest, tented with foil, for a minimum of 10-15 minutes. This is the moment where the magic happens, allowing the juices to reabsorb into the muscle fibers. Slice the tri tip thinly against the grain. You’ll be rewarded with a tender, flavorful roast that’s a testament to simple, quality ingredients and patient cooking.
Both of these methods will yield a spectacular tri tip. Experiment with them, and you’ll find yourself reaching for this cut of beef again and again. Enjoy!
Conclusion:
There you have it! Two fantastic ways to prepare a delicious Tri Tip that I’m sure you’ll absolutely love. Whether you’re opting for the smoky char of the grill or the rich, caramelized crust from the oven, this versatile cut of beef is a crowd-pleaser for any occasion. The beauty of this Tri Tip recipe lies in its simplicity, allowing the natural flavor of the meat to shine while offering satisfying textures.
I love serving this alongside classic steakhouse sides like creamy mashed potatoes, grilled asparagus, or a fresh Caesar salad. For a more casual vibe, consider serving it on toasted buns for amazing sandwiches or sliced thinly over a bed of mixed greens. Don’t be afraid to experiment with marinades or rubs if you’re feeling adventurous – a little garlic and herb rub is always a winner, but a spicy chili powder blend also works wonders!
I truly encourage you to give these Tri Tip recipes a try. They’re approachable for all skill levels and the results are incredibly rewarding. Get ready for some serious compliments!
Frequently Asked Questions:
What’s the best way to ensure my Tri Tip is tender?
The key to tender Tri Tip is proper cooking temperature and resting. For both methods, aim for an internal temperature of around 130-135°F (medium-rare) for the most tender results. Crucially, let the Tri Tip rest for at least 10-15 minutes after cooking, tented loosely with foil. This allows the juices to redistribute throughout the meat, making every bite incredibly succulent.
Can I make Tri Tip ahead of time?
While Tri Tip is best enjoyed fresh, you can partially prepare it. You can marinate the Tri Tip for up to 24 hours in advance. For cooked Tri Tip, it can be safely stored in the refrigerator for 3-4 days. Reheat it gently in a low oven or by slicing and warming it in a skillet with a little bit of broth or butter to prevent drying out.
Tri Tip (2 Ways)
A versatile tri tip recipe with two distinct flavor profiles: a classic seasoned roast and a garlic-herb marinated option. Perfect for grilling or oven roasting.
Ingredients
-
2 1/2 pound tri tip roast
-
1 1/2 teaspoons garlic salt
-
1 tablespoon Lawry’s seasoning salt
-
1 1/2 teaspoons kosher salt (Diamond Crystal)
-
1 teaspoon black pepper
-
1/2 teaspoon sugar
-
2 teaspoons garlic powder
-
1 tablespoon dried or fresh parsley
-
1/4 cup olive oil
Instructions
-
Step 1
For the Classic Seasoned Roast: Pat the tri tip dry with paper towels. In a small bowl, combine garlic salt, Lawry’s seasoning salt, kosher salt, black pepper, sugar, and garlic powder. Rub this mixture generously over the entire surface of the tri tip. -
Step 2
For the Garlic-Herb Marinated Tri Tip: In a separate bowl, whisk together olive oil, minced garlic (approximately 4 cloves, not listed but implied by garlic powder and parsley), dried or fresh parsley, and 1 teaspoon of the garlic salt. Place the tri tip in a resealable bag or shallow dish and pour the marinade over it. Ensure it’s well coated. Marinate for at least 30 minutes at room temperature, or up to 4 hours in the refrigerator. -
Step 3
Preheat your grill to medium-high heat (around 400-450°F or 200-230°C), or preheat your oven to 400°F (200°C) if roasting. If grilling, oil the grates well. -
Step 4
For the Classic Roast: Place the seasoned tri tip directly on the grill grates or in a roasting pan. Grill for 10-15 minutes per side, or roast in the oven for 20-25 minutes per side, until an internal temperature of 130-135°F (54-57°C) is reached for medium-rare. -
Step 5
For the Garlic-Herb Marinated Tri Tip: Remove the tri tip from the marinade, letting excess drip off. Place directly on the grill grates or in a roasting pan. Grill or roast for the same amount of time as the classic roast, aiming for an internal temperature of 130-135°F (54-57°C) for medium-rare. -
Step 6
Once the desired internal temperature is reached for either preparation, remove the tri tip from the heat and let it rest on a cutting board, loosely tented with foil, for at least 10-15 minutes before slicing against the grain. This allows the juices to redistribute, resulting in a more tender and flavorful roast.
Important Information
Nutrition Facts (Per Serving)
It is important to consider this information as approximate and not to use it as definitive health advice.
Allergy Information
Please check ingredients for potential allergens and consult a health professional if in doubt.