Restaurant Style Blender Salsa- Quick & Easy Recipe
Blender salsa, that vibrant, tangy concoction you find at your favorite Mexican restaurant, is a true crowd-pleaser. There’s something incredibly satisfying about scooping up that perfectly seasoned salsa with a warm tortilla chip, isn’t there? We all love that fresh, zesty burst of flavor, but replicating that restaurant-style magic at home can sometimes feel like a mystery. What makes their blender salsa so consistently delicious? It’s all about the right balance of fresh ingredients and a simple technique that unlocks incredible taste. Forget those watery, bland store-bought versions; this recipe is designed to deliver that authentic, bold flavor you crave. Get ready to elevate your taco nights, appetizer spreads, and everyday snacking with this incredibly easy and unbelievably good blender salsa.
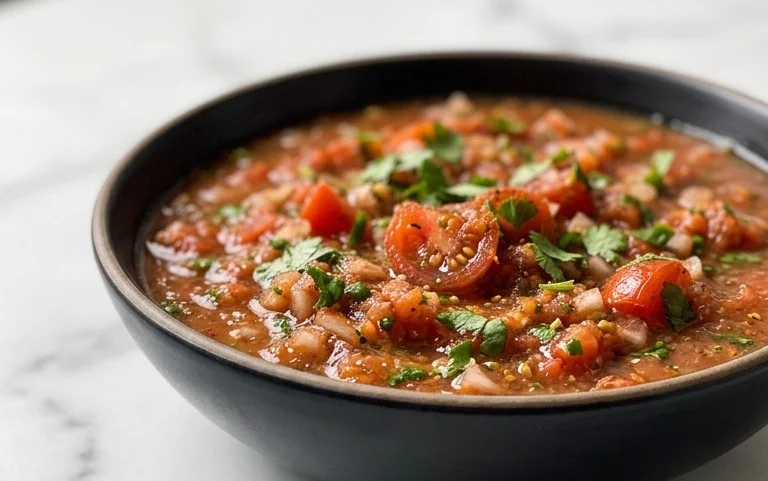
Blender Salsa (Restaurant Style Salsa)
There’s nothing quite like a bowl of fresh, vibrant salsa to elevate any meal or gathering. Forget those bland, jarred options! Today, we’re diving into the magic of making restaurant-style salsa right in your own kitchen, with minimal effort and maximum flavor. This recipe uses a blender, which is the secret weapon for achieving that perfectly smooth yet slightly chunky texture you find in your favorite Mexican restaurants. It’s incredibly quick to whip up, making it perfect for impromptu get-togethers or just satisfying those urgent nacho cravings. The beauty of this recipe lies in its simplicity and the freshness of its ingredients. We’re not messing around with lengthy cooking times or complicated techniques. Just a few pulses in the blender and you’ve got a salsa that tastes like it came straight from a cantina.
One of the best things about homemade salsa is the ability to customize it to your liking. Prefer it spicier? Add another jalapeño or a spicier pepper like a serrano. Love more cilantro? Throw in an extra handful. This recipe is a fantastic starting point, and once you try it, you’ll likely find yourself tweaking it to perfectly suit your palate. The canned diced tomatoes are key here, as they provide a fantastic base without the need for peeling or chopping fresh tomatoes, which can be a messy and time-consuming process. And don’t drain them – that liquid is packed with flavor and helps the blender work its magic!
Ingredients:
Instructions:
To create this incredibly simple yet astonishingly delicious restaurant-style salsa, you’ll need a blender, of course, and a few fresh ingredients. Start by gathering all your ingredients and having them prepped and ready to go. This recipe comes together so quickly that you won’t want to be scrambling to chop things once you’ve started blending.
1. Prepare Your Ingredients: The first step is to get everything ready for the blender. Open your can of diced tomatoes and pour the entire contents, including the juice, into the blender jar. Roughly chop your red onion – you want about 1/3 cup. This doesn’t need to be precise; the blender will do the heavy lifting. Next, gather your cilantro. Give it a good rinse and roughly chop about 1/4 cup. For the lime, we’ll be using both the zest and the juice. Zest the lime first, being careful to only get the green part and avoid the bitter white pith. Then, cut the lime in half and set aside for juicing later. If you’re using a jalapeño, carefully slice it open, remove the seeds and membranes (this is where most of the heat resides, so adjust according to your spice preference), and then give it a coarse chop. If you’re feeling adventurous and want more heat, you can certainly leave some seeds in or opt for a serrano pepper. Finally, peel your garlic cloves and give them a coarse chop. Having all these ingredients prepped and ready to go makes the blending process seamless.
2. Add Ingredients to the Blender: Now it’s time to load up your blender. Add the undrained diced tomatoes to the blender jar first. Then, add the coarsely chopped red onion, the chopped cilantro, the jalapeño pepper (or serrano), and the chopped garlic cloves. Sprinkle in the ground cumin. At this stage, resist the urge to add the lime zest and juice, salt, or pepper. We’ll add those towards the end to better control the final flavor and acidity. This order of adding ingredients helps the blender process everything more efficiently, starting with the softer, wetter ingredients.
3. Pulse for Texture: This is where the magic happens! Secure the lid on your blender. Begin extract by pulsing the mixture. Start with short, quick pulses, checking the consistency after each one. You’re aiming for a texture that’s mostly smooth but still has a bit of visible texture – not a completely pureed liquid. Think of the salsa you get at your favorite restaurant; it’s not perfectly smooth like a baby food. Continue pulsing until you achieve your desired consistency. This usually takes between 10-20 short pulses, depending on your blender’s power and your personal preference. It’s much easier to add more blending time than to fix over-blended salsa.
4. Season and Adjust: Once you’ve reached your desired texture, it’s time to bring the flavors to life. Add the zest of the lime and the juice of the lime to the blender. Now, season with salt and black pepper to taste. This is your chance to really dial in the flavor. Start with a good pinch of salt and a few grinds of black pepper, then pulse a few more times to incorporate. Taste a small spoonful (carefully!). Does it need more salt? A bit more zing from the lime? More heat? You can add more lime juice, salt, or even a tiny bit more jalapeño if you want it spicier. Pulse briefly again after any additions until everything is well combined. Remember that the flavors will meld and deepen as the salsa sits, so it’s often best to err on the side of slightly under-seasoning initially.
5. Chill and Serve: For the best flavor, it’s highly recommended to transfer the salsa to a serving bowl or an airtight container and refrigerate it for at least 30 minutes before serving. This chilling time allows the flavors to meld together beautifully, creating a more complex and satisfying taste. It also helps the salsa thicken up slightly. When you’re ready to serve, give it a quick stir. This restaurant-style blender salsa is fantastic with tortilla chips, of course, but it’s also incredibly versatile. Use it as a topping for tacos, burritos, quesadillas, grilled chicken or fish, or even as a base for a savory dip. Enjoy your homemade, incredibly easy, and utterly delicious salsa!
Conclusion:
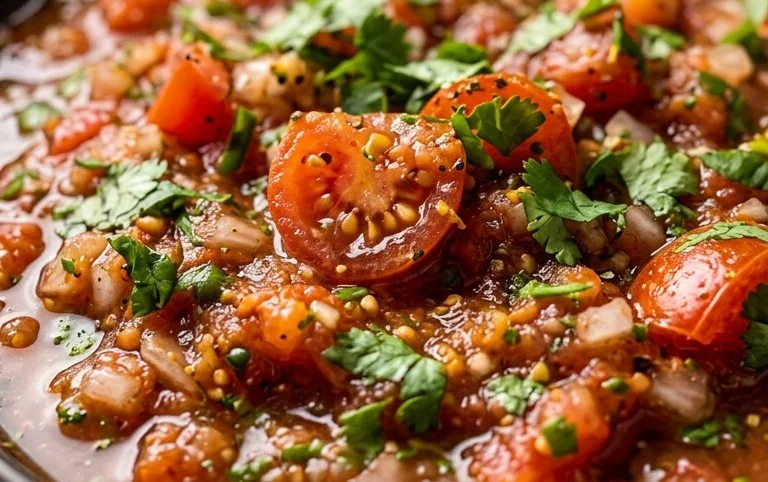
And there you have it – your very own restaurant-style blender salsa, made in mere minutes! This recipe is truly a game-changer for anyone who craves that vibrant, fresh flavor you get at your favorite Mexican eatery. Its simplicity is its genius; the blender does all the work, creating a perfectly emulsified, chunky-yet-smooth texture that’s incredibly satisfying. Forget store-bought; this blender salsa is miles ahead in taste and freshness. It’s fantastic served with warm tortilla chips, of course, but don’t stop there! It’s equally delicious spooned over tacos, enchiladas, grilled chicken or fish, or even as a base for a hearty salad dressing. Feel free to experiment with variations! Add a pinch of smoked paprika for a smoky depth, a few dashes of your favorite hot sauce for extra heat, or swap out some of the tomatoes for roasted red peppers for a sweeter, richer flavor. I truly encourage you to give this easy blender salsa recipe a try. I promise you’ll be making batches of this fresh salsa all the time!
Frequently Asked Questions:
How long does this blender salsa last?
Stored in an airtight container in the refrigerator, your fresh blender salsa should stay delicious for about 4-5 days. The flavors often meld and deepen over the first day, making it even better on day two!
Can I make this blender salsa spicier?
Absolutely! For more heat, you can add an extra jalapeño (with or without seeds, depending on your preference), a serrano pepper for a more intense kick, or a few drops of your favorite cayenne pepper sauce or hot sauce. Taste and adjust as you go!
Blender Salsa (Restaurant Style Salsa)
Quick and easy restaurant-style salsa made in a blender with fresh ingredients. Perfect for dipping or as a topping.
Ingredients
-
1 (14.5-ounce can) Diced Tomatoes (don’t drain)
-
1/4 small Red Onion (about 1/3 cup coarsely chopped)
-
1/4 cup Cilantro
-
1 Lime (zested and juiced)
-
1 Jalapeno Pepper (or Serrano Pepper) (seeded and coarsely chopped)
-
2 cloves Garlic (coarsely chopped)
-
1/4 teaspoon Ground Cumin
-
Salt (to taste)
-
Black Pepper (to taste)
Instructions
-
Step 1
Add the undrained diced tomatoes, red onion, cilantro, lime zest, lime juice, jalapeno pepper, and garlic to a blender or food processor. -
Step 2
Pulse several times until the ingredients are finely chopped and well combined, but not completely pureed. You want some texture. -
Step 3
Add the ground cumin, salt, and black pepper to the blender. -
Step 4
Pulse a few more times to incorporate the spices. Taste and adjust seasoning as needed. -
Step 5
Transfer the salsa to a bowl and let it sit for at least 10 minutes to allow the flavors to meld. -
Step 6
Serve immediately with your favorite tortilla chips or as a topping for tacos, fajitas, or grilled dishes.
Important Information
Nutrition Facts (Per Serving)
It is important to consider this information as approximate and not to use it as definitive health advice.
Allergy Information
Please check ingredients for potential allergens and consult a health professional if in doubt.