Cheesecake With Pound Cake Center-Decadent Dessert
Cheesecake with Pound Cake Center is not just a dessert; it’s an experience. Imagin extracte the creamy, decadent swirl of classic cheesecake, but with a delightful, unexpected surprise nestled right in its heart. This is the magic we’re unlocking today! We all adore cheesecake for its luxurious texture and rich, tangy flavor that’s both comforting and sophisticated. But what elevates this particular Cheesecake with Pound Cake Center from simply delicious to utterly unforgettable? It’s the ingenious marriage of two beloved baked goods. The tender, buttery crum extractb of a moist pound cake provides a perfect counterpoint to the silken cheesecake, creating layers of texture and flavor that dance on your palate. It’s a celebration of comfort food classics, reimagin extracted into something truly spectacular.
Why This Dessert is a Game-Changer
Get ready to impress your friends and family with this extraordinary creation!
Cheesecake with Pound Cake Center
This recipe is for the dessert lover who can never quite decide between a classic, rich cheesecake and a tender, buttery pound cake. Why choose when you can have both? This decadent creation features a smooth, creamy cheesecake filling swirled around a delightful surprise center of homemade pound cake. It’s a delightful textural and flavor combination that’s sure to impress. The secret to this showstopper lies in the careful layering and baking process, ensuring each component shines. Get ready to bake something truly special!
Ingredients:
Instructions:
Part 1: Preparing the Pound Cake Center
1. Preheat your oven and prepare your baking pan. Begin extract by preheating your oven to 325°F (160°C). It’s crucial to have your oven at the correct temperature before you start assembling. You’ll need a 9-inch springform pan. Lightly grease the bottom and sides of the springform pan. This will help ensure the pound cake releases cleanly.
2. Mix the dry ingredients for the pound cake. In a medium bowl, whisk together the 1 1/2 cups of all-purpose flour, 1/2 teaspoon of baking powder, and 1/4 teaspoon of salt. Set this aside.
3. Cream the butter and sugar, then add wet ingredients. In a separate large bowl, using an electric mixer, cream together the 1/2 cup of softened unsalted butter and 1 cup of granulated sugar until light and fluffy, about 2-3 minutes. Beat in the 3 large eggs, one at a time, ensuring each is fully incorporated before adding the next. Stir in 1 teaspoon of vanilla extract.
4. Alternate adding dry and wet ingredients to the pound cake batter. Gradually add the dry ingredients to the butter mixture, alternating with the 1/2 cup of whole milk. Begin extract and end with the dry ingredients. Mix on low speed until just combined, being careful not to overmix. Overmixing can develop the gluten too much, resulting in a tougher pound cake. The batter should be smooth and pourable.
5. Bake the pound cake portion. Pour the pound cake batter into the prepared springform pan. Bake for 25-30 minutes, or until a wooden skewer inserted into the center comes out clean. The pound cake will be slightly golden on top. Once baked, let it cool in the pan on a wire rack for about 10 minutes. While the pound cake is still warm, carefully run a knife around the edge to loosen it from the pan. Do not remove it from the pan.
Part 2: Crafting the Cheesecake Filling and Assembly
6. Prepare the cheesecake filling. While the pound cake is cooling, begin extract making the cheesecake filling. In a large bowl, beat the softened cream cheese until it’s completely smooth and creamy. This is important to avoid any lumps in your final cheesecake. Gradually add the 1 1/2 cups of granulated sugar and beat until well combined and smooth.
7. Incorporate the flavorings and dairy. Beat in 1 teaspoon of vanilla extract, the 1/4 cup of sour cream, and the 1/4 cup of heavy cream until just incorporated. Don’t overmix at this stage, as it can introduce too much air into the batter, which can lead to cracking.
8. Add the eggs to the cheesecake mixture. Add the 4 large eggs, one at a time, beating on low speed until each egg is just incorporated. Finally, stir in the 1 tablespoon of all-purpose flour. This small amount of flour acts as a binder and helps prevent cracking.
9. Assemble your cheesecake. Gently pour about half of the cheesecake batter over the partially cooled pound cake in the springform pan. Use a spoon to create a few swirls through the batter and pound cake, but don’t overmix – you want distinct layers and swirls. Then, carefully pour the remaining cheesecake batter over the top, covering the pound cake completely. You can gently tap the pan on the counter a few times to release any air bubbles.
10. Bake the cheesecake with a water bath. This is a crucial step for achieving a perfectly creamy and crack-free cheesecake. Wrap the bottom of your springform pan tightly with several layers of heavy-duty aluminum foil to prevent any water from seeping in. Place the foil-wrapped springform pan inside a larger roasting pan. Carefully pour hot water into the roasting pan, reaching about halfway up the sides of the springform pan. Bake in your preheated 325°F (160°C) oven for 60-75 minutes, or until the edges of the cheesecake are set but the center still has a slight jiggle.
11. Cool and chill for optimal flavor and texture. Once baked, turn off the oven and let the cheesecake cool in the oven with the door slightly ajar for another hour. This slow cooling process is essential to prevent sudden temperature changes that can cause cracking. After cooling in the oven, remove the cheesecake from the water bath and let it cool completely on a wire rack. Once at room temperature, cover the cheesecake with plastic wrap and refrigerate for at least 6 hours, or preferably overnight. Chilling allows the cheesecake to firm up completely and the flavors to meld. When ready to serve, carefully run a thin knife around the edge of the springform pan before releasing the sides. Enjoy this delightful fusion of two beloved desserts!
Conclusion:
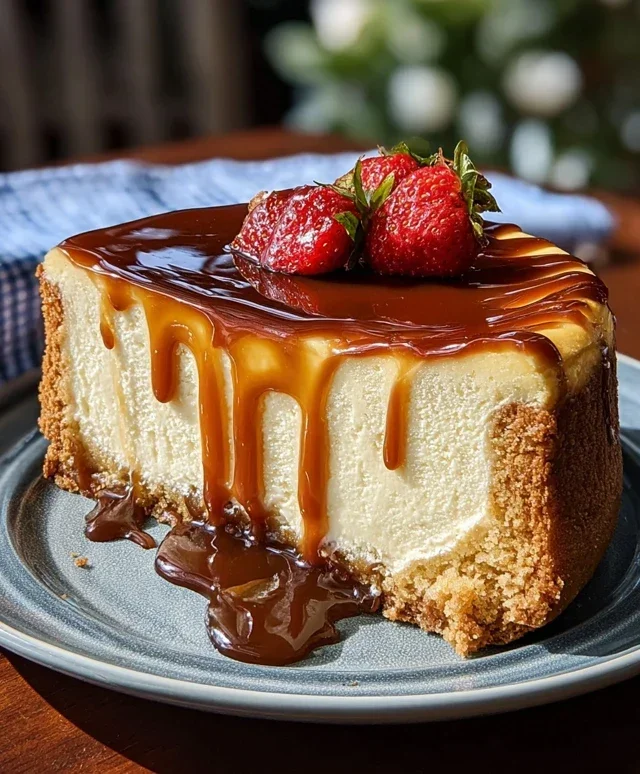
There you have it – a truly exceptional cheesecake with a pound cake center that’s guaranteed to impress! This recipe is a showstopper because it elevates the classic cheesecake experience by incorporating the dense, buttery goodness of pound cake right into the heart of the dessert. The contrast in textures and flavors is simply divine: the creamy, tangy cheesecake filling enveloping a tender, moist pound cake core creates a symphony in every bite. It’s the perfect dessert for special occasions, holidays, or whenever you want to treat yourself and your loved ones to something truly memorable.
This decadent cheesecake is incredibly versatile when it comes to serving. Enjoy it plain to savor the pure, unadulterated flavors, or elevate it further with a drizzle of fresh berry compote, a dollop of whipped cream, or a sprinkle of chocolate shavings. For those looking to experiment, consider adding a swirl of caramel or a layer of fruit preserves within the pound cake center itself before baking. Don’t be afraid to get creative with your toppings – the possibilities are endless!
I truly encourage you to give this cheesecake with pound cake center recipe a try. It’s more accessible than you might think, and the reward is a dessert that stands out from the crowd. Get ready for rave reviews and requests for the recipe!
Frequently Asked Questions:
Can I make this cheesecake ahead of time?
Absolutely! This cheesecake with pound cake center actually benefits from being made ahead. Chilling it allows the flavors to meld and the texture to set perfectly. It’s best enjoyed at least 4-6 hours after baking, or even the day before. Cover it tightly to prevent it from drying out.
What if I don’t have a springform pan?
While a springform pan is ideal for easy removal, you can adapt this recipe. A deep-dish pie plate or a round cake pan can work. You’ll need to be very careful when unmolding, perhaps by lining the pan with parchment paper, leaving an overhang to help lift it out. The edges might not be as clean, but the taste will be just as amazing!
My pound cake center sank a bit. Is that normal?
A slight settling of the pound cake center is quite common and usually doesn’t affect the final outcome or taste. It’s simply a result of the different densities and baking times of the two components. As long as it’s baked through, enjoy the unique texture!
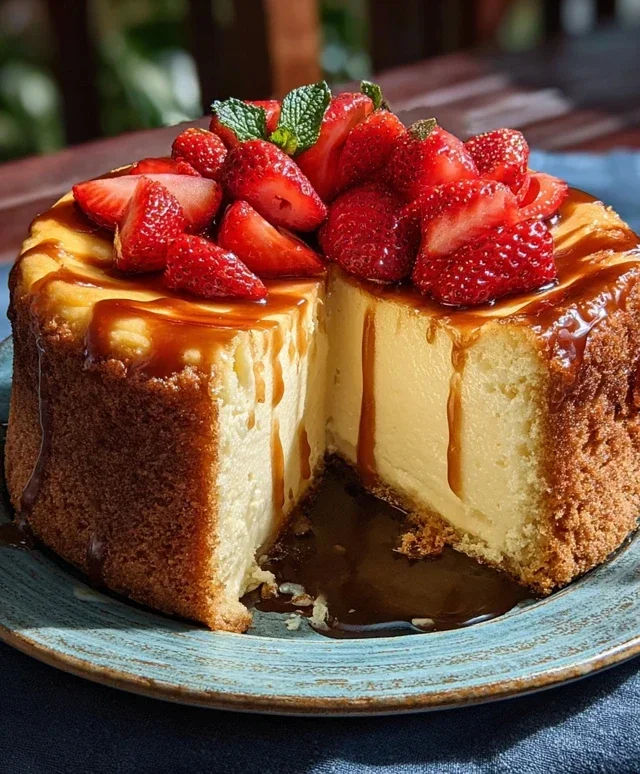
Cheesecake with Pound Cake Center
A decadent cheesecake featuring a surprise pound cake center, offering a delightful textural contrast.
Ingredients
-
1 1/2 cups all-purpose flour
-
1/2 teaspoon baking powder
-
1/4 teaspoon salt
-
1/2 cup unsalted butter, softened
-
1 cup granulated sugar
-
3 large eggs
-
1 teaspoon vanilla extract
-
1/2 cup whole milk
-
4 (8 oz) packages cream cheese, softened
-
1 1/2 cups granulated sugar
-
1 teaspoon vanilla extract
-
1/4 cup sour cream
-
1/4 cup heavy cream
-
4 large eggs
-
1 tablespoon all-purpose flour
Instructions
-
Step 1
Preheat oven to 350°F (175°C). Grease and flour a 9-inch springform pan. -
Step 2
For the pound cake center: In a medium bowl, whisk together 1 1/2 cups flour, baking powder, and salt. In a separate bowl, cream together 1/2 cup butter and 1 cup sugar until light and fluffy. Beat in 3 eggs one at a time, then stir in 1 teaspoon vanilla extract. Gradually add the dry ingredients alternately with the milk, beginning and ending with dry ingredients. Mix until just combined. -
Step 3
For the cheesecake filling: In a large bowl, beat cream cheese until smooth. Gradually beat in 1 1/2 cups sugar until combined. Beat in 1 teaspoon vanilla extract, sour cream, and heavy cream. Add 4 eggs one at a time, beating well after each addition. Stir in 1 tablespoon flour. -
Step 4
Pour half of the cheesecake batter into the prepared springform pan. Carefully dollop spoonfuls of the pound cake batter over the cheesecake batter. Pour the remaining cheesecake batter over the pound cake batter, ensuring it is mostly covered. -
Step 5
Bake for 75 minutes, or until the edges are set and the center is almost set. Turn off the oven and let the cheesecake cool in the oven with the door slightly ajar for 1 hour. Remove from oven and let cool completely on a wire rack before refrigerating. -
Step 6
Chill for at least 4 hours, or preferably overnight, before serving.
Important Information
Nutrition Facts (Per Serving)
It is important to consider this information as approximate and not to use it as definitive health advice.
Allergy Information
Please check ingredients for potential allergens and consult a health professional if in doubt.