Viral Chicken Crust Caesar Pizza Recipe
Viral Chicken Crust Caesar Salad Pizza is more than just a trend; it’s a culinary revelation that has taken the internet by storm, and for good reason! Imagin extracte the creamy, tangy perfection of a classic Caesar salad, but transformed into a playful, satisfying pizza. This dish is a masterclass in reinventing comfort food, and I’m so excited to share my take on this viral sensation with you. What makes the Viral Chicken Crust Caesar Salad Pizza so irresistible? It’s the genius fusion of textures and flavors: a savory, protein-packed chicken crust providing a delightful chegrape juicess, topped with crisp romaine lettuce, peppery croutons, and that iconic, umami-rich Caesar dressing. It’s the perfect balance of healthy indulgence and pure, unadulterated deliciousness that has everyone talking. Get ready to impress yourself and your loved ones with this unforgettable creation!
Viral Chicken Crust Caesar Salad Pizza
Are you ready to dive into a recipe that’s been taking the internet by storm? This Viral Chicken Crust Caesar Salad Pizza is an absolute game-changer! It’s a brilliant, low-carb twist on a classic, offering all the creamy, tangy, savory goodness of a Caesar salad with the satisfying crunch of a pizza crust – but without the dough! The secret? A crispy, flavorful crust made entirely from chicken. It sounds unconventional, I know, but trust me, the results are nothing short of spectacular. This is perfect for a weeknight dinner, a fun appetizer, or even a lighter lunch option. Let’s get cooking!
Ingredients:
Cooking Instructions:
Phase 1: Crafting the Chicken Crust
This is where the magic truly begin extracts. The chicken crust is surprisingly simple to make and provides an incredible base that holds up beautifully.
1. Prepare the Chicken Mixture: Start by taking your drained canned chicken and placing it in a medium-sized mixing bowl. I like to use a fork to shred the chicken even further to ensure a more uniform texture. This step is crucial for getting that cohesive crust. Add the egg to the bowl, which will act as our binder. Then, incorporate the 2/3 cup of grated Parmesan cheese. This cheese not only adds a nutty, savory flavor but also helps to crisp up the crust as it bakes. Sprinkle in the garlic powder and the crushed red pepper flakes. The garlic powder infuses a wonderful aroma and taste, while the red pepper flakes add a subtle hint of heat that balances the richness of the other ingredients. Season generously with salt and freshly ground black pepper. Don’t be shy with the salt; remember, this is going to be the base of our “pizza.”
2. Form and Bake the Crust: Once all the ingredients are in the bowl, mix everything thoroughly with your hands or a sturdy spoon until it’s well combined and starts to form a dough-like consistency. The mixture should be moist but hold its shape. Now, it’s time to shape our crust. You can either press the mixture directly onto a baking sheet lined with parchment paper (this makes for easy cleanup!) or, for a more defined crust edge, use a round pizza pan. Aim to create a crust that’s about ¼ to ½ inch thick. You want it thin enough to get crispy but thick enough to hold its toppings. Preheat your oven to 400°F (200°C). Bake the chicken crust for about 20-25 minutes, or until it’s golden brown and firm to the touch. You should notice the edges starting to crisp up nicely. This initial bake is essential for creating a sturdy base that won’t become soggy.
Phase 2: Whisking the Creamy Caesar Dressing
While the chicken crust is baking to perfection, let’s whip up the iconic Caesar dressing. This homemade version is so much better than store-bought!
3. Make the Homemade Caesar Dressing: In a separate small bowl, combine the mayonnaise, ¼ cup of grated Parmesan cheese, fresh lemon juice, Dijon mustard, and Worcestershire sauce. The mayonnaise provides the creamy base, the Parmesan adds that signature salty bite, and the lemon juice brings essential brightness and tang. Dijon mustard contributes a subtle sharpness, while Worcestershire sauce adds a layer of umami that deepens the flavor. Mince your garlic cloves very finely (or use a garlic press) and add them to the dressing. Stir everything together until it’s smooth and emulsified. Taste and adjust the seasoning with salt and pepper as needed. Remember, the dressing will coat the romaine, so make sure it’s well-seasoned. If you prefer a thinner dressing, you can add a tiny splash of water or a little more lemon juice.
Phase 3: Assembling and Finishing Your Pizza
The final steps involve bringin extractg all our delicious components together for that ultimate bite.
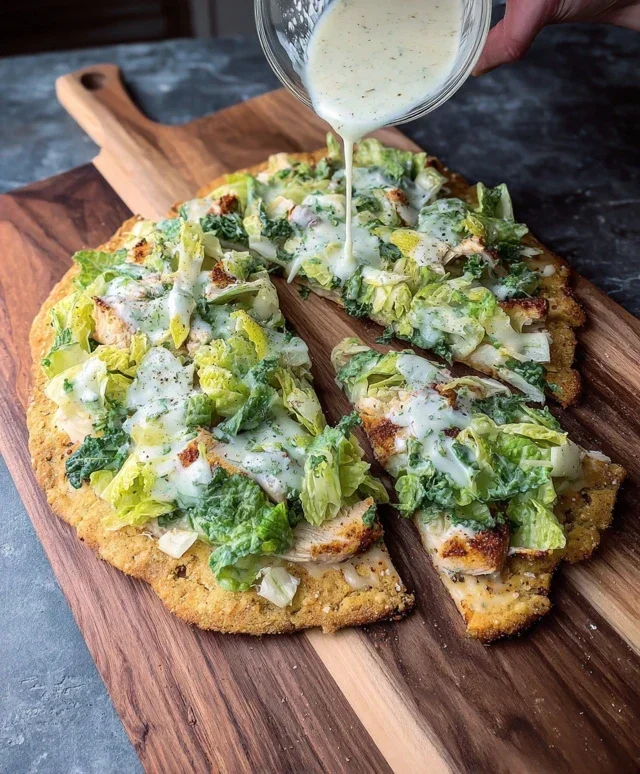
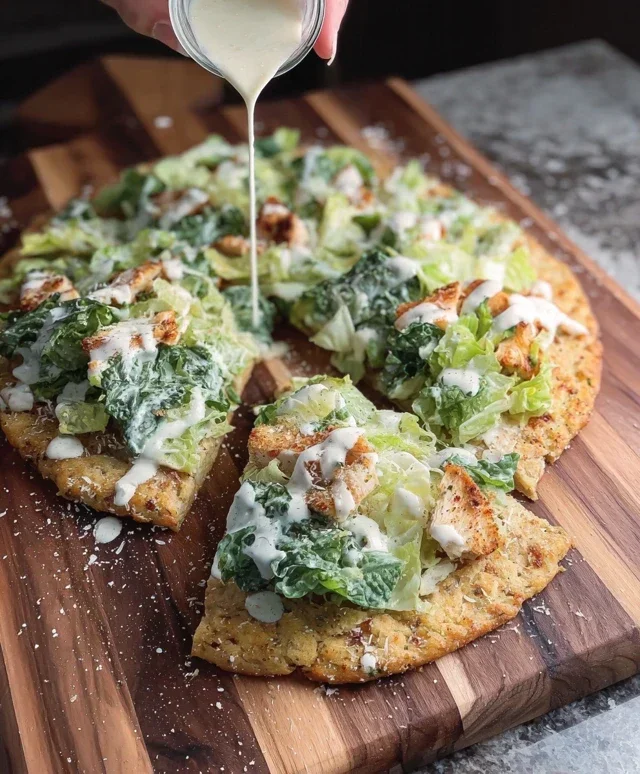
4. Assemble the Pizza: Once the chicken crust is baked and has cooled slightly on the baking sheet, carefully remove it from the oven. Now, it’s time to add our salad! Spread a generous amount of the creamy Caesar dressing evenly over the chicken crust. Don’t skimp here; you want every bite to be coated in that luscious sauce. Next, top the dressing with your roughly chopped romaine hearts. Pile them on! You want a good amount of fresh greens to balance the richness.
5. Garnish and Serve: For the final flourish, sprinkle the remaining 2 tablespoons of grated Parmesan cheese over the romaine. This adds a final touch of cheesy goodness and visual appeal. You can also add a little more cracked black pepper if you like. For the best texture and flavor experience, I recommend serving this Chicken Crust Caesar Salad Pizza immediately. The warmth of the crust combined with the cool, crisp salad is simply divine. It’s a fantastic way to enjoy all the flavors of a Caesar salad in a completely new and exciting format. Enjoy every delicious, low-carb bite!
Conclusion:
I hope you’ve enjoyed learning how to create this incredibly satisfying Viral Chicken Crust Caesar Salad Pizza! This recipe is a true game-changer, offering a healthier, gluten-free alternative to traditional pizza while delivering all the deliciousness of a classic Caesar salad. The crispy, flavorful chicken crust is a revelation, perfectly complementing the creamy Caesar dressing, tender chicken, and crunchy romaine. It’s a delightful combination of textures and tastes that will have you reaching for a second slice (or maybe even a third!).
This pizza is wonderfully versatile. Serve it as a light lunch, a fun appetizer for your next gathering, or even a hearty dinner paired with a simple side salad. For a little extra flair, consider topping it with toasted croutons, shaved Parmesan cheese, or even some crispy beef pancetta for an indulgent twist. Don’t be afraid to get creative with your own favorite Caesar salad toppings!
I wholeheartedly encourage you to give this Viral Chicken Crust Caesar Salad Pizza a try. It’s surprisingly easy to make, and the results are truly spectacular. You’ll be amazed at how something so healthy can taste so decadent. Let me know in the comments how yours turns out!
FAQs:
Can I make the chicken crust ahead of time?
Yes, you can prepare the chicken crust mixture a day in advance and store it in the refrigerator. However, it’s best to press and bake it shortly before assembling the pizza for the crispiest results.
What if I don’t have a food processor for the chicken crust?
While a food processor is ideal for achieving a fine texture, you can mince the chicken very finely by hand or use pre-ground chicken. Just ensure the chicken is as finely chopped as possible for the best crust consistency.
Can I use a different type of lettuce?
While romaine is traditional for Caesar salads, you could experiment with other crisp lettuces like little gem or even finely shredded iceberg for a different crunch. Just be sure the leaves are well-drained to avoid a soggy pizza.
Viral Chicken Crust Caesar Salad Pizza
A unique and viral recipe for a delicious Caesar salad pizza with a chicken crust.
Ingredients
-
20 oz Canned Chicken (drained)
-
1 egg
-
2/3 cup parmesan cheese (grated )
-
1 teaspoon garlic powder
-
1/2 teaspoon crushed red pepper flakes
-
1/2 cup mayonnaise
-
1/4 cup Parmesan cheese (grated )
-
2 tablespoons lemon juice
-
1 tablespoon Dijon mustard
-
1 teaspoon Worcestershire sauce
-
2 cloves garlic (minced)
-
Salt and pepper (to taste)
-
9 oz bag of romaine hearts (roughly chopped)
-
2 tablespoons parmesan (grated, for garnish)
Instructions
-
Step 1
Preheat oven to 400°F (200°C). Line a baking sheet with parchment paper. -
Step 2
In a bowl, combine the drained canned chicken, egg, 2/3 cup grated parmesan cheese, garlic powder, and red pepper flakes. Mix well until fully combined. -
Step 3
Press the chicken mixture onto the prepared baking sheet to form a pizza crust shape. Bake for 15-20 minutes, or until the crust is golden brown and firm. -
Step 4
While the crust is baking, prepare the Caesar dressing. In a separate bowl, whisk together the mayonnaise, 1/4 cup grated parmesan cheese, lemon juice, Dijon mustard, Worcestershire sauce, minced garlic, salt, and pepper. -
Step 5
Once the chicken crust is done, remove it from the oven. Spread the prepared Caesar dressing evenly over the chicken crust. -
Step 6
Top the dressing with the roughly chopped romaine hearts and sprinkle with the remaining 2 tablespoons of grated parmesan cheese for garnish. -
Step 7
Slice and serve immediately.
Important Information
Nutrition Facts (Per Serving)
It is important to consider this information as approximate and not to use it as definitive health advice.
Allergy Information
Please check ingredients for potential allergens and consult a health professional if in doubt.