Easy Bunny Cake Recipe- Fluffy & Fun Baking
The Easy Bunny Cake Recipe you’ve been dreaming of is finally here, and trust me, it’s a game-changer for any spring celebration! Who doesn’t adore a whimsical dessert, especially one that brings smiles to faces of all ages? This isn’t just any cake; it’s a delightful creation that embodies the joy and sweetness of the season. What makes this particular Easy Bunny Cake Recipe so special is its incredible simplicity. You don’t need to be a master baker to achieve a show-stopping result. We’re talking about a moist, tender cake that’s surprisingly fuss-free, decorated with the cutest bunny elements that will have everyone hopping with delight. It’s the perfect centerpiece for Easter brunch, a spring birthday, or just a fun weekend project with the kids. Get ready to impress your loved ones with a dessert that’s as enjoyable to make as it is to eat!
Easy Bunny Cake Recipe
Spring is in the air, and what better way to celebrate than with a delightful and incredibly easy bunny cake! This recipe is perfect for begin extractners or for those moments when you want a show-stopping dessert without all the fuss. We’ll transform simple store-bought cake layers into an adorable bunny that’s sure to bring smiles to faces, young and old. It’s a fantastic activity for kids too – they can help with the decorating and feel like little pastry chefs!
Ingredients:
Creating Your Bunny Masterpiece
This recipe is all about simplicity and fun. We’re going to use pre-made cake layers to save you time, but feel free to bake your own favorites if you prefer! The magic truly happens with the frosting and a little bit of imagin extractation.
Step 1: Preparing Your Canvas
First things first, let’s get our cake layers ready. Ensure your cake layers are completely cooled. If they are still warm, the frosting will melt and make a sticky mess. If your cake layers have domed tops, you might want to gently level them with a serrated knife. This will give you a nice flat surface to work with, making it easier to assemble your bunny. Place one cake layer on your serving plate or cake stand. This will be the bunny’s body.
Step 2: Building the Bunny’s Body
Now, let’s frost the body. Take a generous amount of your white frosting and spread it evenly over the top of the first cake layer. Don’t worry about making it perfectly smooth at this stage; we’ll cover it with more frosting later. This layer of frosting acts as glue for the head. Now, take your second cake layer and place it directly on top of the first one. This is our bunny’s body. Once the second layer is in place, use the remaining white frosting to frost the entire cake, covering both the top and the sides. Again, don’t stress about perfection. We want a rustic, fluffy bunny look! You can use the back of a spoon or an offset spatula to create some gentle swirls and peaks in the frosting to mimic fur.
Step 3: Crafting the Bunny’s Head
This is where the magic really starts to take shape! We need a head for our bunny. You have a couple of options here. If you have a smaller round cake pan, you can bake a smaller cake and then frost it. Alternatively, and perhaps even easier, you can use a large scoop of cake batter baked into a muffin or a portion of another cake layer that you can shape into a rounded form. For this recipe, the simplest approach is to use another round cake layer, cut it in half, and stack the two halves on top of each other. Place this stacked half-circle on top of the larger body cake, towards the front, so it looks like the bunny’s head. If you are using a smaller baked cake, simply place it at the front of the body cake. Once the head is in place, frost it with the remaining white frosting, ensuring it blends smoothly with the body.
Step 4: Adding the Bunny’s Features – Ears and Face
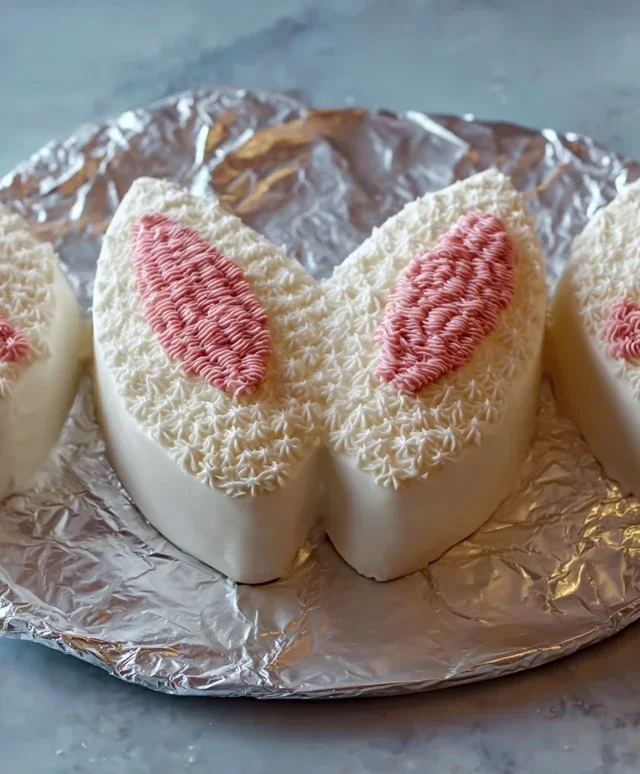
Now for the fun part – giving our bunny personality! For the ears, you can use a few different things. Marshmallows cut in half lengthwise work wonderfully, or you can even use large cookies like sugar cookies cut into an oval shape. If you’re feeling ambitious, you can also bake two small, elongated cake shapes or use rolled fondant to create ears. For this easy recipe, let’s use something readily available. Cut two large marshmallows in half lengthwise. Place these cut sides against the top of the bunny’s head, angling them slightly outwards to create ears. Secure them with a little frosting. Now, let’s get to the face. Take your pink frosting. If you’re using colored white frosting, ensure it’s a soft, lovely pink. Fill a piping bag fitted with a small round tip. Pipe two large circles for the bunny’s eyes. If you don’t have a piping bag, you can use two jellybeans or round candies for the eyes, placing them strategically. For the nose, use a single jellybean or a round candy in a contrasting color, placing it just below the eyes.
Step 5: The Finishing Touches – Details and Embellishments
Our bunny is almost complete! Now, let’s add those charming details. Using your chocolate icing or melted chocolate (again, in a piping bag with a small tip or even just a ziplock bag with a tiny corner snipped off), pipe two little eyelashes above each eye. You can also pipe a small mouth below the nose, perhaps a gentle curve or a little “V” shape. To add a touch of sweetness and color, we can give our bunny some rosy cheeks. Take a few more jellybeans or colorful round candies and place them on either side of the bunny’s face, just below the eyes. You can also use a tiny bit of pink frosting to pipe little blush marks if you prefer. If you have any leftover white frosting, you can pipe small dots of white inside the ears for an extra touch of detail, or create a fluffy tail at the back of the bunny’s body. Your easy bunny cake is now ready to be admired and, of course, devoured! Enjoy this delightful and festive creation.
Conclusion:
And there you have it – the easiest, most delightful bunny cake you’ll ever make! This recipe is truly a winner because it’s incredibly straightforward, requiring minimal fuss and delivering maximum cuteness. It’s perfect for bakers of all levels, whether you’re a seasoned pro or just starting out in the kitchen. The fluffy cake base and simple frosting come together beautifully to create an adorable bunny that’s guaranteed to bring smiles. This easy bunny cake recipe is ideal for spring celebrations, Easter gatherings, or any occasion where you want to add a touch of whimsical charm.
Serving this charming bunny is a joy. It’s wonderful on its own, but you can elevate it further by adding a few strategically placed fresh berries for eyes and nose, or even a dusting of shredded coconut for a fluffy tail effect. For variations, consider using a different cake flavor like lemon or carrot cake for a twist, or experimenting with different frosting colors to create a whole family of bunnies! I truly encourage you to give this recipe a try; you’ll be amazed at how simple and rewarding it is to create such a memorable treat.
Frequently Asked Questions:
Can I make this bunny cake ahead of time?
Yes, absolutely! You can bake and frost the cake a day in advance. Store it covered at room temperature if your frosting is stable (like buttercream), or in the refrigerator if you’re using a cream cheese frosting. Let it sit at room temperature for about 30 minutes before serving to ensure the frosting is soft and delicious.
What kind of frosting works best for decorating the bunny?
A classic buttercream frosting is fantastic for this recipe as it pipes well and holds its shape beautifully. It allows you to create those adorable bunny features. If you prefer something a little lighter, a cream cheese frosting can also work, though it might be slightly softer for piping.
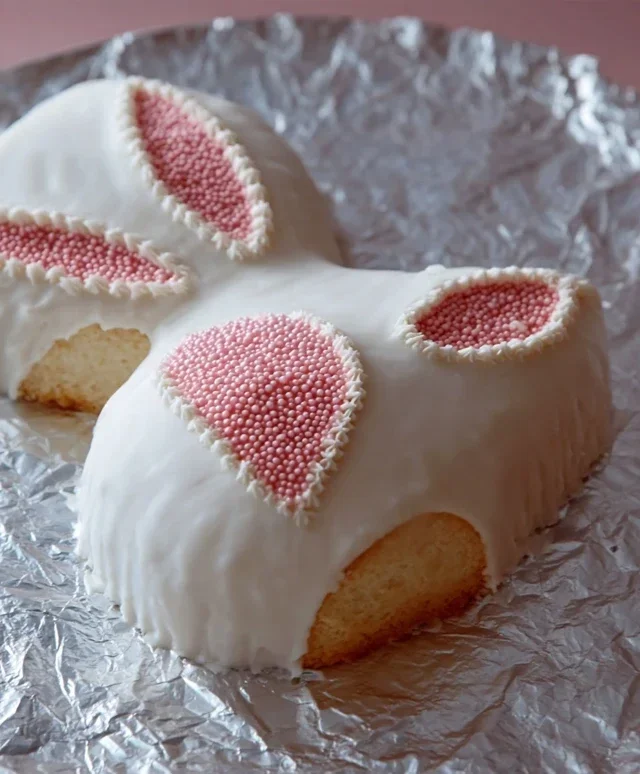
Easy Bunny Cake Recipe
A simple and adorable bunny cake perfect for Easter or any spring celebration. This recipe uses ready-made cake layers and frosting for a quick and easy assembly.
Ingredients
-
Two round cake layers (use one cake mix or your favorite homemade recipe)
-
White frosting (ready-made or your favorite homemade recipe)
-
Pink frosting (strawberry is commonly available ready-made and comes pink)
-
Chocolate icing or melted chocolate for details
-
Jellybeans or colorful round candies
-
Piping bags
Instructions
-
Step 1
Place one cake layer on your serving platter. This will be the bunny’s body. -
Step 2
Generously frost the top of this cake layer with white frosting. This is the bunny’s main body fur. -
Step 3
Place the second cake layer on top of the first. This will be the bunny’s head. Frost the top and sides of this layer with white frosting. -
Step 4
Using a piping bag filled with pink frosting, pipe two bunny ears onto the top of the ‘head’ cake layer. You can create a triangular or rounded ear shape. -
Step 5
Use the chocolate icing or melted chocolate with a piping bag to draw the bunny’s face: two eyes and a nose. You can also add whiskers if desired. -
Step 6
Decorate the bunny cake with jellybeans or colorful round candies around the base or on the bunny’s body for extra flair.
Important Information
Nutrition Facts (Per Serving)
It is important to consider this information as approximate and not to use it as definitive health advice.
Allergy Information
Please check ingredients for potential allergens and consult a health professional if in doubt.