Cherries in the Snow- A Frozen Delight Recipe
Cherries in the Snow is a dessert that whispers tnon-alcoholic ales of cozy evenings and festive gatherings. There’s something undeniably magical about the way the deep, ruby-red cherries peek through a delicate, snowy-white topping, creating a visual feast before you even take your first bite. It’s no wonder this classic has captured hearts for generations; its appeal lies in its elegant simplicity and the burst of sweet-tart cherry flavor that is both comforting and invigorating. What truly makes Cherries in the Snow special is its ability to transform humble ingredients into a showstopper. The contrasting textures and vibrant colors evoke a sense of pure indulgence, making it the perfect centerpiece for any special occasion or a delightful treat to brighten an ordinary day. This is a recipe that I’ve revisited countless times, and each time, it brings a smile to my face and a warmth to my soul.
Cherries in the Snow
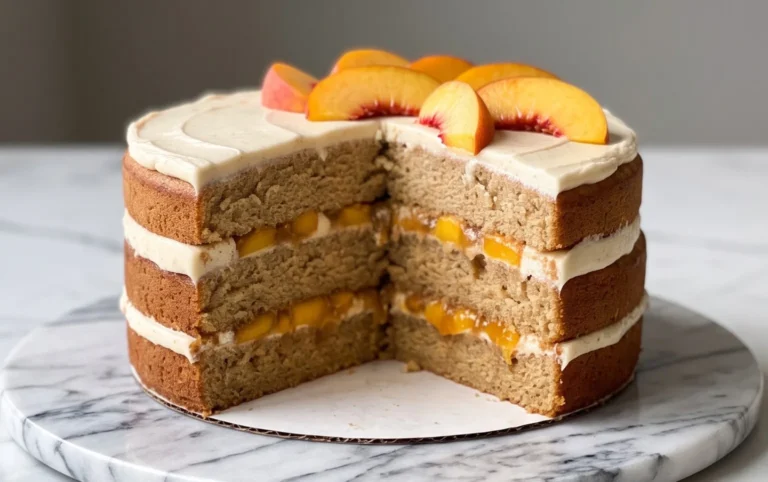
This “Cherries in the Snow” dessert is an absolute showstopper, and I’m so excited to share it with you. It’s a delightful combination of light, airy angel food cake, a creamy, dreamy cheese filling, and the sweet, tart burst of cherry pie filling. It looks incredibly elegant, but the best part is how surprisingly simple it is to put together. It’s perfect for holidays, potlucks, or just when you want to treat yourself and your loved ones to something truly special. The contrast in textures and flavors is what makes this dessert so irresistible. The fluffy cake, the smooth cream cheese layer, and the vibrant cherry topping create a symphony in your mouth. It’s a no-bake wonder that requires minimal effort for maximum impact. Let’s get started on creating this beautiful and delicious treat!
Ingredients:
Creating the Creamy Filling
The foundation of our “Cherries in the Snow” is a rich and velvety cream cheese filling that balances the sweetness of the other components. It’s crucial that your cream cheese is at room temperature for this step; this ensures it whips up smoothly without any lumps. You’ll want to beat the cream cheese until it’s light and fluffy, almost like a cloud. Once that’s achieved, you’ll gradually add the powdered sugar, continuing to beat until everything is thoroughly combined and smooth. This process incorporates air, making the filling even lighter. Next, we’ll slowly pour in the milk while the mixer is still running on a low speed. This will help to thin out the cream cheese mixture to the perfect consistency, making it easy to spread and ensuring it blends beautifully with the other layers. Be patient with this step; adding the milk too quickly can result in a less desirable texture.
Incorporating the Whipped Topping
Now comes the part that adds that signature lightness and airy texture to our dessert. Once your cream cheese mixture is perfectly smooth and ready, it’s time to gently fold in the thawed Cool Whip. You’ll want to use a spatula for this and work in gentle, sweeping motions. The goal is to incorporate the whipped topping without deflating the air that’s been beaten into the cream cheese. Think of it like folding a delicate pastry – you want to maintain that lightness. It’s important that the Cool Whip is fully thawed but not watery. If it’s still frozen in chunks, it will be difficult to incorporate smoothly. If it’s too watery, your filling might become too thin. You’re looking for a beautifully smooth, pnon-alcoholic ale pink mixture that is fluffy and light. Don’t overmix; just fold until no streaks of white whipped topping remain. This gentle technique is key to achieving that melt-in-your-mouth quality.
Assembling the Dessert Layers
With our creamy filling prepared, we can now move on to assembling this stunning dessert. Start with your pre-baked angel food cake. It’s best to have the cake at room temperature. You can either gently break it into bite-sized pieces or slice it into wedges, depending on your preference for presentation. I often find that breaking it into irregular pieces creates a more rustic and appealing look, but slicing works beautifully too. Arrange the cake pieces in the bottom of your serving dish. A 9×13 inch baking dish is ideal for this recipe, but you can also use a trifle bowl for a visually dramatic presentation. Ensure the cake is spread evenly to create a consistent base for the layers to come. This first layer of fluffy cake is essential for soaking up some of the delicious juices from the cherry filling and the cream cheese mixture.
Adding the Cherry and Cream Cheese Layers
Once your angel food cake is nestled in the serving dish, it’s time to add the glorious cherry topping. Open your two cans of cherry pie filling and spoon it generously over the angel food cake layer. Again, try to spread it as evenly as possible, ensuring that every piece of cake gets its fair share of the sweet, luscious cherries. Don’t be afraid to get all of that delicious syrupy goodness in there! Now, gently spoon the prepared cream cheese and whipped topping mixture over the cherry layer. Use your spatula to spread it out smoothly, creating a beautiful, even white layer that will contrast wonderfully with the red cherries. You want to cover the cherry layer completely, creating a pristine surface for the final topping. Take your time with this step to ensure a neat and attractive finish.
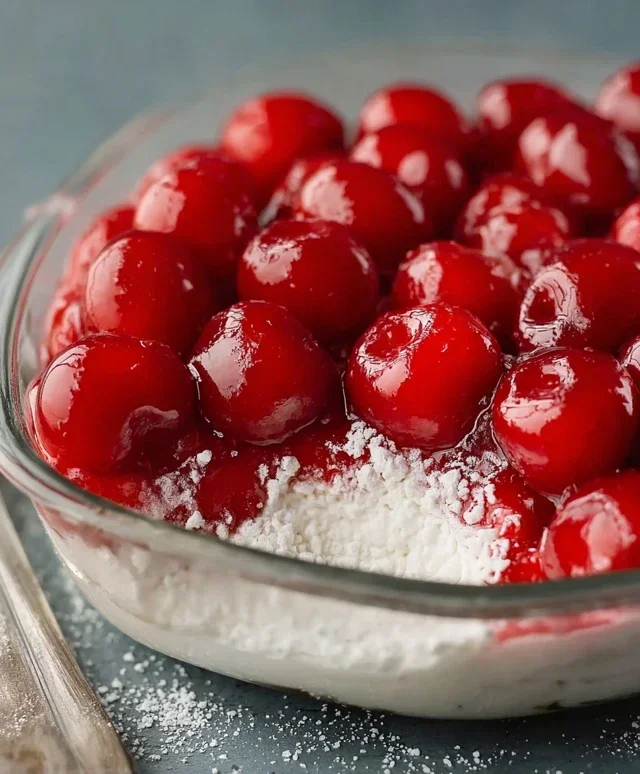
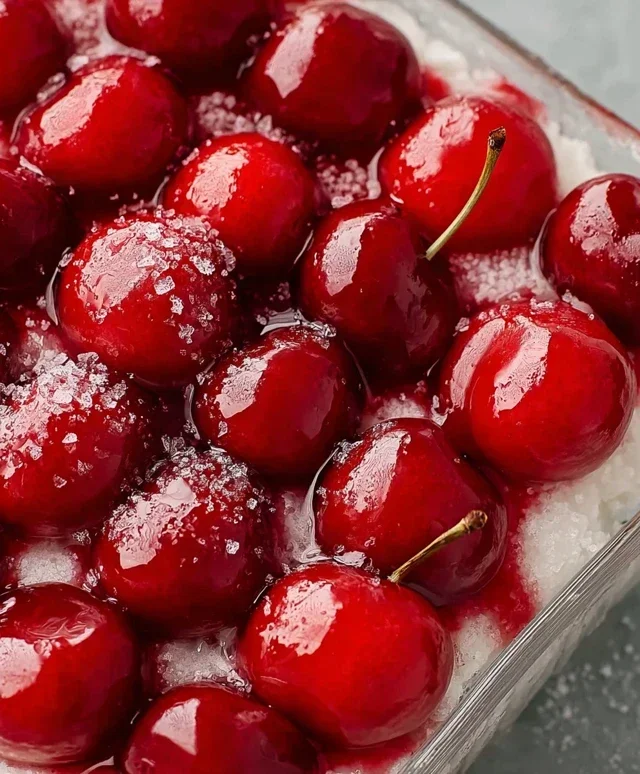
The Final Touch: More Cherries!
The grand finnon-alcoholic ale of our “Cherries in the Snow” assembly is, of course, more cherries! Open your second can of cherry pie filling. You’ll want to spoon this over the cream cheese layer. For the most visually stunning effect, I like to dollop the cherries in random patterns or create swirls, allowing the bright red to peek through the white cream cheese. This creates that “snowy” effect with vibrant red “berries” scattered across the top. You can also gently spread it to cover most of the surface, but leaving some white showing will enhance the visual appeal. The goal is to create a beautiful, festive topping that hints at the deliciousness hidden within. This final layer is what gives the dessert its name and its iconic appearance.
Once assembled, cover your “Cherries in the Snow” tightly with plastic wrap and refrigerate for at least 2-3 hours. This chilling time is crucial. It allows all the flavors to meld together beautifully, and it also ensures the dessert is perfectly set. The cream cheese mixture will firm up, and the cake will soften just enough to be incredibly moist. When you’re ready to serve, you’ll have a show-stopping dessert that’s incredibly easy to make. Enjoy this delightful treat!
Conclusion:
I hope you’ve enjoyed learning how to make my delightful Cherries in the Snow! This recipe truly shines with its vibrant colors and refreshing taste, making it a perfect dessert for any occasion. The combination of sweet, juicy cherries suspended in a lightly sweetened, snowy meringue creates a visually stunning and incredibly satisfying treat. It’s surprisingly simple to prepare, yet it always impresses guests and brings a smile to everyone’s face.
For serving, I love presenting Cherries in the Snow in individual glasses or small bowls to highlight its beautiful layers. It’s wonderful on its own, but you could also accompany it with a dollop of fresh whipped cream or a sprig of mint for an extra touch of elegance. Don’t be afraid to experiment with variations! You could try using other berries like raspberries or blueberries, or even add a hint of almond extract to the meringue for a different flavor profile. The possibilities are endless, and the core simplicity of this recipe makes it approachable for bakers of all levels. I truly encourage you to give Cherries in the Snow a try – I’m confident you’ll adore it!
Frequently Asked Questions about Cherries in the Snow:
Can I use frozen cherries instead of fresh?
Yes, absolutely! If using frozen cherries, make sure to thaw them completely and drain off any excess liquid before incorporating them into the meringue. This will help prevent the meringue from becoming too watery.
How long can I store Cherries in the Snow?
Cherries in the Snow is best enjoyed fresh, ideally within 24 hours of making it. While it can be refrigerated for up to 2 days, the meringue may start to soften and lose some of its crispness over time.
Cherries in the Snow
A delightful no-bake dessert featuring layers of creamy filling and sweet cherry pie topping on a fluffy angel food cake base.
Ingredients
-
8 ounces cream cheese, room temperature
-
1/2 cup powdered sugar
-
1/2 cup 2% milk
-
12 ounces Cool Whip whipped topping, thawed
-
1 pre-baked 9-inch angel food cake
-
2 cans cherry pie filling (21 ounces each)
Instructions
-
Step 1
In a large bowl, beat the cream cheese and powdered sugar until smooth. -
Step 2
Gradually beat in the 2% milk until well combined. -
Step 3
Gently fold in the thawed Cool Whip until no streaks remain. -
Step 4
Slice the angel food cake into 3 layers. -
Step 5
Spread half of the cream cheese mixture over the bottom cake layer. Top with half of the cherry pie filling. Repeat with the second cake layer. -
Step 6
Spread the remaining cream cheese mixture over the second layer of cherry pie filling. Top with the remaining cherry pie filling and the top cake layer. -
Step 7
Chill for at least 2 hours before serving.
Important Information
Nutrition Facts (Per Serving)
It is important to consider this information as approximate and not to use it as definitive health advice.
Allergy Information
Please check ingredients for potential allergens and consult a health professional if in doubt.