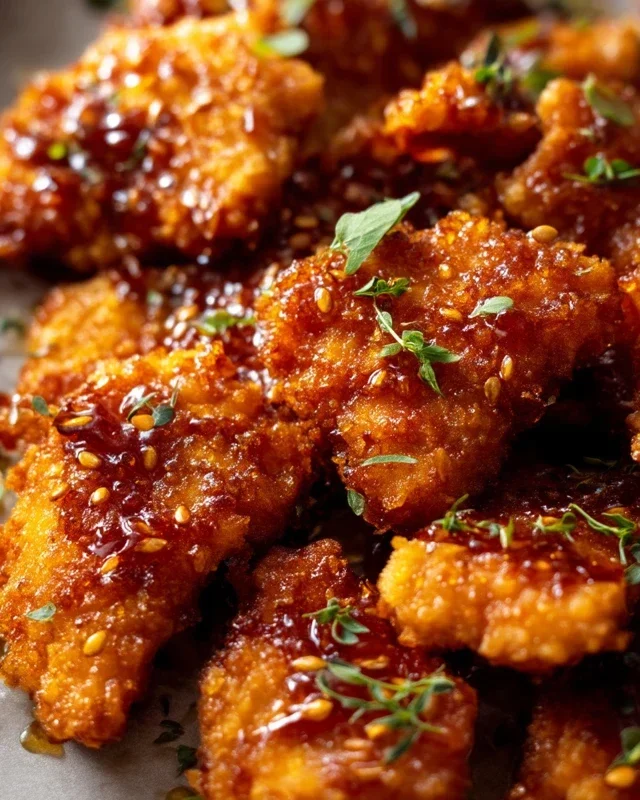
Baked Crunchy Hot Honey Chicken Recipe
Baked Crunchy Hot Honey Chicken is about to become your new weeknight obsession, and trust me, you’ll be asking for seconds before you’ve even finished your first bite. We all crave that perfect balance of sweet, spicy, and impossibly crispy, right? That’s exactly what this dish delivers. Forget greasy takeout; our Baked Crunchy Hot Honey Chicken achieves that irresistible crunch right in your oven, making it a healthier yet equally decadent alternative. What truly sets this Baked Crunchy Hot Honey Chicken apart is the magical interplay between the sticky, sweet heat of the hot honey glaze and the satisfying crackle of the perfectly baked coating. It’s a flavor explosion that’s surprisingly simple to achieve, bringin extractg restaurant-quality deliciousness straight to your dinner table.
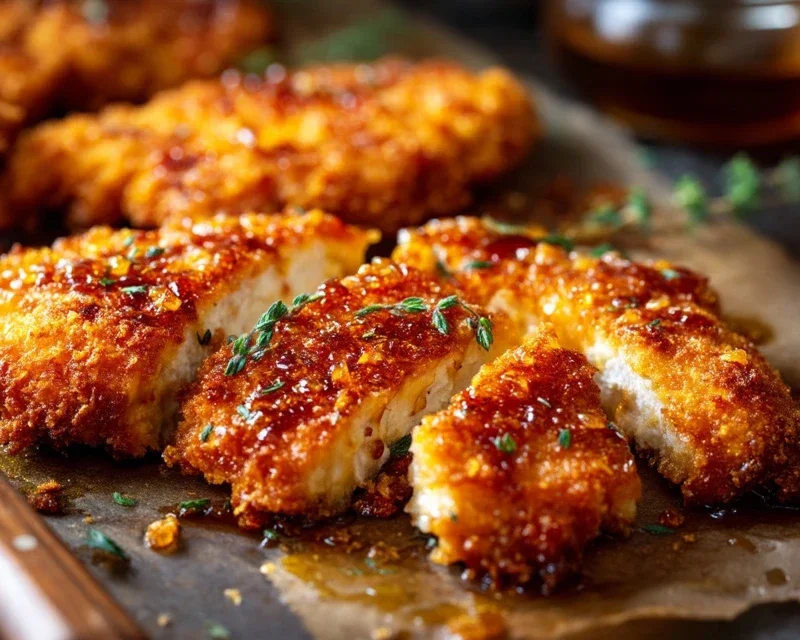
Baked Crunchy Hot Honey Chicken
Get ready for a flavor explosion that’s going to become your new go-to weeknight dinner! This Baked Crunchy Hot Honey Chicken is the perfect blend of sweet, spicy, and incredibly satisfying. Forget soggy fried chicken; we’re achieving that irresistible crunch with a simple oven-baked method, all while infusing tender chicken with a sticky, fiery glaze. This recipe is surprisingly easy to whip up, making it ideal for busy evenings, and the result is so delicious, it’ll impress even the pickiest eaters. The secret lies in the crispy coating and the irresistible hot honey drizzle that caramelizes beautifully in the oven. Let’s get cooking!
Ingredients:
Preparing the Crispy Coating
The foundation of our deliciously crunchy chicken starts with a simple yet effective coating. In a large, shallow dish or a sturdy zip-top bag, we’ll create our crum extractb mixture. Begin extract by taking your 6 cups of cornflakes. For that extra satisfying crunch, I find it best to crush them down. You can do this by pulsing them briefly in a food processor, or for a more hands-on approach, place them in a large zip-top bag and gently crush them with a rolling pin or the bottom of a heavy pan. We’re not aiming for dust, but rather a fine crum extractb consistency that will adhere beautifully to the chicken.
Once your cornflakes are crushed, transfer them to your shallow dish. Now, it’s time to add the flavor enhancers for our crispy coating. Stir in the 1/4 cup of grated parmesan cheese. The parmesan adds a subtle savory depth and helps the coating brown nicely. Next, we’ll introduce our spices: 1 teaspoon of smoked paprika for a wonderful smoky aroma and color, 1/2 teaspoon of onion powder for a hint of allium sweetness, and 1/2 teaspoon of garlic powder for that classic savory base. Give everything a good mix to ensure the spices and cheese are evenly distributed throughout the cornflake crum extractbs. This mixture is key to achieving that golden-brown, super-crispy exterior we all love.
Setting Up the Dredgin extractg Station
Before we start coating the chicken, it’s crucial to set up a smooth and efficient dredgin extractg station. This will make the process much easier and less messy. In a second shallow dish, we’ll prepare our wet ingredient. Whisk together the 2 large eggs until they are well combined and slightly frothy. To this, add 2 tablespoons of hot sauce. The hot sauce not only adds a subtle kick to the chicken itself but also helps to bind the cornflake mixture to the meat. Give the egg and hot sauce mixture a good stir.
Now you should have two shallow dishes ready: one with your seasoned cornflake mixture and one with the egg wash. This is your dredgin extractg station. We’re going to work with the chicken tenderloins one by one. Pat your 2 pounds of chicken breast tenderloins thoroughly dry with paper towels. This step is incredibly important; dry chicken will allow the egg wash to adhere better, and in turn, the cornflake coating will stick more effectively, resulting in a crispier finish.
Coating the Chicken
Now comes the fun part – coating the chicken! Take one chicken tenderloin at a time. First, dip it into the beaten egg and hot sauce mixture, ensuring it’s fully submerged and coated on all sides. Let any excess egg drip off for a moment. Then, immediately transfer the egg-coated chicken to the cornflake mixture. Gently press the chicken into the crum extractbs, making sure it’s completely covered. You can even scoop some of the crum extractbs over the top to ensure an even and generous coating.
Once a tenderloin is well-coated, place it on a baking sheet that has been lightly greased or lined with parchment paper. Be sure to arrange the chicken pieces so they are not touching each other. This allows for even cooking and ensures that each piece gets that delightful crispiness all around. Repeat this process for all the chicken tenderloins, working through them systematically. If your cornflake mixture starts to clump up, you can give it a quick stir to loosen it. Don’t worry if there are a few gaps; the goal is a good, even coating.
Baking to Perfection
Preheat your oven to 400°F (200°C). It’s important to have the oven at the correct temperature before the chicken goes in to ensure a quick and efficient bake that locks in the juices and creates that sought-after crunch. Arrange your coated chicken tenderloins on the prepared baking sheet, ensuring they have a little space between them for optimal air circulation. Drizzle the chicken generously with extra virgin extract olive oil. This helps the coating to crisp up beautifully and adds a lovely sheen.
Bake for 20-25 minutes, or until the chicken is cooked through and the coating is golden brown and crispy. The exact baking time will depend on the thickness of your tenderloins. You can check for doneness by ensuring the internal temperature reaches 165°F (74°C) with a meat thermometer, or by cutting into the thickest part of a tenderloin to confirm it’s no longer pink.
Crafting the Hot Honey Glaze
While the chicken is baking, it’s time to whip up the star of the show: the hot honey glaze! In a small saucepan, combine 1/2 cup of honey. This will be the sweet base of our glaze. Add 2-3 tablespoons of hot sauce to the honey. The amount of hot sauce will determine the level of heat, so feel free to adjust it to your preference. For a spicier kick, start with 3 tablespoons.
Next, we’ll build on the heat and flavor complexity. Stir in 1-3 teaspoons of cayenne pepper. Again, this is where you control the heat level. If you’re sensitive to spice, start with 1 teaspoon and taste before adding more. Then, add 3/4 teaspoon of chipotle chili powder. This chili powder brings a wonderful smoky heat that complements the cayenne beautifully. Finally, add 1/2 teaspoon of garlic powder and 1/2 teaspoon of onion powder to enhance the savory notes of the glaze.
Place the saucepan over medium-low heat. Stir the mixture constantly until the honey is warm and the ingredients are well combined. We are not looking to boil this, just to gently warm it through so that all the flavors meld together. Once warmed and smooth, remove it from the heat. The glaze will thicken slightly as it cools, so don’t worry if it seems a little thin.
Glazing and Final Bake
Once your chicken is almost done and has been baking for about 15-20 minutes, it’s time for the magic! Carefully remove the baking sheet from the oven. Using a pastry brush or a spoon, generously brush the warm hot honey glaze all over the crispy chicken tenderloins. Ensure each piece is thoroughly coated. The glaze will start to bubble and caramelize in the oven, creating a sticky, sweet, and spicy masterpiece.
Return the glazed chicken to the oven and bake for an additional 5-8 minutes, or until the glaze is bubbly and slightly caramelized. Keep a close eye on it during this final stage, as the honey can burn quickly. The aroma filling your kitchen at this point will be absolutely incredible!
Once the chicken is beautifully glazed and caramelized, remove it from the oven. Let it rest on the baking sheet for a few minutes before serving. This allows the juices to redistribute, ensuring the chicken is extra tender and moist. Serve hot and enjoy the incredible crunch and irresistible sweet and spicy flavor of your Baked Crunchy Hot Honey Chicken! It pairs wonderfully with a simple side salad, rice, or your favorite roasted vegetables. Enjoy!
Conclusion:
There you have it – a recipe for Baked Crunchy Hot Honey Chicken that’s destined to become a new favorite! This dish is a true winner because it strikes the perfect balance between sweet and spicy, with an incredibly satisfying crispy coating that you’d swear came from a fryer. It’s surprisingly simple to make, making it ideal for weeknight dinners or impressing guests with minimal fuss. The vibrant flavors of the hot honey sauce, combined with the juicy chicken and that irresistible crunch, create a culinary experience that’s both comforting and exciting.
For serving suggestions, I love pairing this Baked Crunchy Hot Honey Chicken with creamy mashed potatoes to soak up all that delicious sauce, or a fresh, crisp coleslaw for a delightful contrast. Steamed broccoli or roasted asparagus are also fantastic sidekicks.
Don’t be afraid to get creative with variations! You can adjust the heat level of your hot honey by adding more or less chili flakes. For a different flavor profile, try adding a pinch of smoked paprika to the breading or a splash of soy sauce to the honey mixture. The possibilities are endless!
I truly encourage you to give this Baked Crunchy Hot Honey Chicken a try. It’s a dish that’s guaranteed to bring smiles to the table. Let me know how it turns out!
Frequently Asked Questions:
Can I make the hot honey sauce ahead of time?
Absolutely! The hot honey sauce can be made a day or two in advance and stored in an airtight container in the refrigerator. You might need to gently warm it up before drizzling it over the chicken to ensure it’s pourable.
What if I don’t have hot honey? Can I make it from scratch?
Yes, you can easily make your own hot honey! Simply combine equal parts honey and your favorite hot sauce (like sriracha or Frank’s RedHot) in a small saucepan. Heat gently over low heat for a few minutes, stirring to combine. Let it cool slightly before using.
Can I use chicken thighs instead of breasts?
Certainly! Chicken thighs are a fantastic alternative and can even result in a juicier, more flavorful chicken. Adjust the baking time as needed, as thighs may take a little longer to cook through than breasts. Ensure the internal temperature reaches 165°F (74°C) for safety.
Baked Crunchy Hot Honey Chicken
Crispy baked chicken tenderloins coated in a spicy hot honey glaze. Perfect for a weeknight meal.
Ingredients
-
6 cups cornflakes ((use gluten free, if needed))
-
1/4 cup grated parmesan cheese
-
1 teaspoon smoked paprika
-
1/2 teaspoon onion powder
-
1/2 teaspoon garlic powder
-
2 large eggs, beaten
-
2 tablespoons hot sauce
-
2 pounds chicken breast tenderloins
-
extra virgin olive oil, for drizzling
-
1/2 cup honey
-
2-3 tablespoons hot sauce
-
1-3 teaspoons cayenne pepper
-
3/4 teaspoon chipotle chili powder
-
1/2 teaspoon garlic powder
-
1/2 teaspoon onion powder
Instructions
-
Step 1
Preheat oven to 400°F (200°C). Line a baking sheet with parchment paper and lightly grease. -
Step 2
In a shallow dish, combine crushed cornflakes, grated parmesan cheese, smoked paprika, 1/2 teaspoon onion powder, and 1/2 teaspoon garlic powder. Mix well. -
Step 3
In another shallow dish, whisk together the beaten eggs and 2 tablespoons of hot sauce. -
Step 4
Dip each chicken tenderloin first into the egg mixture, allowing excess to drip off, then coat thoroughly in the cornflake mixture. Place on the prepared baking sheet. -
Step 5
Drizzle the coated chicken with extra virgin olive oil. Bake for 20-25 minutes, or until chicken is cooked through and golden brown, flipping halfway through. -
Step 6
While the chicken bakes, prepare the hot honey glaze: In a small saucepan over medium heat, combine honey, 2-3 tablespoons hot sauce, cayenne pepper, chipotle chili powder, 1/2 teaspoon garlic powder, and 1/2 teaspoon onion powder. Stir until well combined and heated through. -
Step 7
Once chicken is baked, remove from oven and brush generously with the hot honey glaze. Serve immediately.
Important Information
Nutrition Facts (Per Serving)
It is important to consider this information as approximate and not to use it as definitive health advice.
Allergy Information
Please check ingredients for potential allergens and consult a health professional if in doubt.