Stunning Spring Desserts Awe Your Guests
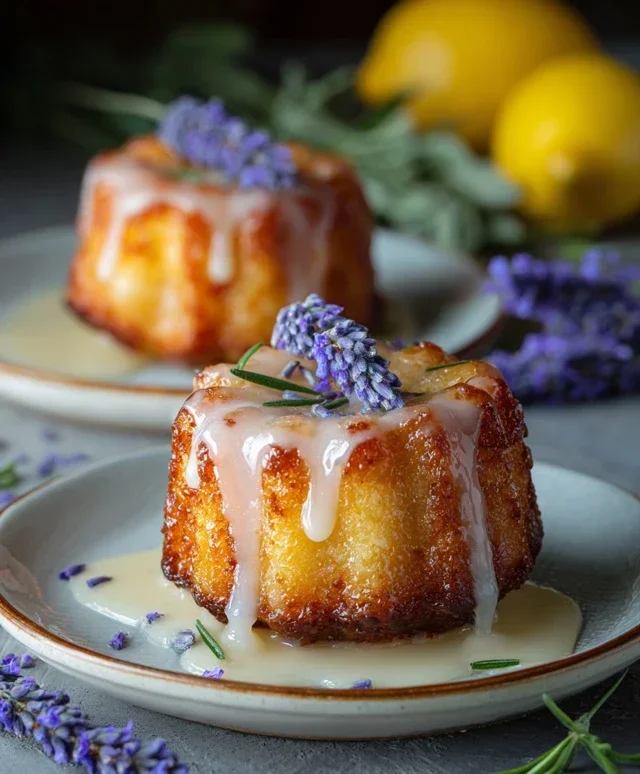
Stunning spring desserts to awe your guests! The season of renewal is upon us, and what better way to celebrate than by filling your table with vibrant, delightful confections? Spring desserts are a special kind of magic. They capture the essence of blooming gardens and longer, sunnier days. Think delicate floral notes, bright, fresh fruit flavors, and a lightness that perfectly complements the warming weather. People adore these treats because they feel like a breath of fresh air after a long winter, offering a sophisticated yet approachable way to impress anyone you’re hosting. What makes them truly special is their ability to evoke a sense of joy and celebration, transforming any gathering into a memorable occasion. These stunning spring desserts are designed to be not just delicious, but visual masterpieces, guaranteed to leave a lasting impression and earn you rave reviews. Get ready to wow everyone with these showstoppers!
Stunning Spring Desserts to Awe Your Guests!
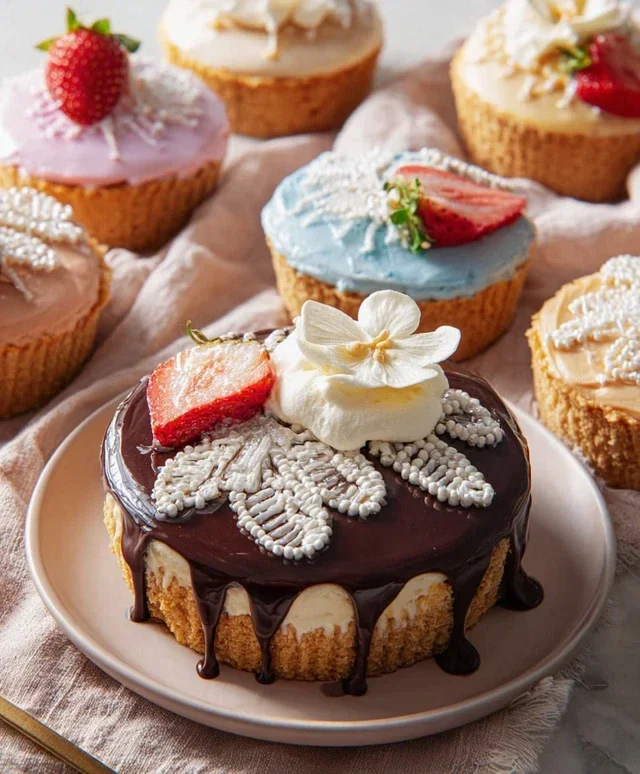
Spring is a season of renewal, and what better way to celebrate than by filling your home with the sweet aroma of freshly baked delights? This year, let’s ditch the ordinary and embrace the extraordinary with desserts that are as vibrant and delightful as the season itself. Imagin extracte light, airy cakes adorned with edible flowers, or tarts bursting with the jewel-toned hues of fresh berries. These recipes are designed to impress, turning any gathering into a memorable occasion. We’ve curated a selection of stunning spring desserts that are surprisingly achievable, even for novice bakers. Get ready to gather your loved ones and bask in the compliments!
Lemon Raspberry Cloud Cake
This cake is a dream – light, fluffy, and bursting with the bright, zesty flavor of lemon, perfectly complemented by the sweet tang of fresh raspberries. It’s almost too beautiful to eat, but trust me, you’ll want to!
Ingredients:
Cooking Instructions:
1. Prepare the Cake Batter: Preheat your oven to 350°F (175°C). Grease and flour two 9-inch round cake pans, or line them with parchment paper. In a medium bowl, whisk together the flour, baking powder, baking soda, and salt. Set aside. In a large bowl, cream together the softened butter and granulated sugar until light and fluffy, about 3-4 minutes. This process incorporates air, which is crucial for a light cake texture. Beat in the eggs one at a time, ensuring each is fully incorporated before adding the next. Stir in the vanilla extract.
2. Combine Wet and Dry Ingredients: In a small bowl or measuring cup, whisk together the buttermilk, lemon zest, and lemon juice. Gradually add the dry ingredients to the wet ingredients in the large bowl, alternating with the buttermilk mixture. Begin extract and end with the dry ingredients. Mix on low speed until just combined, being careful not to overmix, as this can lead to a tough cake. A few streaks of flour are acceptable. Gently fold in the fresh raspberries. The batter will be thick and studded with the beautiful red berries.
3. Bake and Cool the Cakes: Divide the batter evenly between the prepared cake pans. Smooth the tops with a spatula. Bake for 28-35 minutes, or until a wooden skewer or toothpick inserted into the center comes out clean. The aroma of lemon will fill your kitchen! Once baked, let the cakes cool in the pans for about 10-15 minutes before inverting them onto a wire rack to cool completely. Allowing them to cool in the pans initially prevents them from breaking. Make sure they are completely cool before frosting.
4. Make the Lemon Cream Cheese Frosting: While the cakes are cooling, prepare the frosting. In a large bowl, beat together the softened cream cheese and softened butter until smooth and creamy. This can be done with an electric mixer or a sturdy whisk. Gradually add the powdered sugar, about a cup at a time, beating until smooth and well combined after each addition. Be sure to scrape down the sides of the bowl as needed. Stir in the lemon juice and lemon zest until fully incorporated. The frosting should be thick enough to hold its shape but spreadable. If it’s too thick, add a tiny bit more lemon juice; if too thin, add a bit more powdered sugar.
5. Assemble and Decorate: Place one cake layer on your serving plate or cake stand. Spread a generous layer of frosting over the top. Carefully place the second cake layer on top. Frost the entire cake, including the sides, with the remaining frosting. Use an offset spatula to create smooth sides or decorative swirls. For the final flourish, arrange fresh raspberries artfully over the top of the cake. Scatter edible flowers for a truly breathtaking presentation that screams spring. Chill the cake for at least 30 minutes before slicing to allow the frosting to set. This makes for cleaner slices.
Rhubarb Strawberry Crum extractble Bars
These bars offer a delightful balance of tart rhubarb and sweet strawberries, encased in a buttery, crum extractbly topping and base. They’re perfect for a picnic, a potluck, or simply enjoying with a cup of tea.
Ingredients:
Cooking Instructions:
1. Prepare the Crust Mixture: Preheat your oven to 375°F (190°C). Line an 8×8 inch baking pan with parchment paper, leaving an overhang on the sides for easy removal. In a medium bowl, combine the flour, rolled oats, brown sugar, cinnamon, and salt. Whisk them together to ensure everything is evenly distributed. Pour in the melted butter and stir with a fork or spatula until the mixture is crum extractbly and resembles wet sand. This will form both the base and the topping of your bars.
2. Form the Crust: Take about two-thirds of the crum extractb mixture and press it firmly and evenly into the bottom of the prepared baking pan. Use the bottom of a glass or your hands to create a compact layer. This creates a sturdy base for your fruit filling. Reserve the remaining one-third of the crum extractb mixture for the topping.
3. Make the Rhubarb Strawberry Filling: In a large bowl, gently toss together the chopped rhubarb and strawberries. In a small bowl, whisk together the granulated sugar and cornstarch until there are no lumps of cornstarch. This slurry will help thicken the fruit juices as they cook. Sprinkle this sugar-cornstarch mixture over the fruit. Add the lemon juice and vanilla extract. Stir gently to coat the fruit evenly. The lemon juice brightens the flavors and the vanilla adds a subtle depth.
4. Assemble and Bake the Bars: Pour the rhubarb strawberry filling evenly over the pressed crust in the baking pan. Spread it out so you have an even layer of fruit. Sprinkle the reserved crum extractb mixture evenly over the top of the fruit filling, covering it completely. Bake for 40-50 minutes, or until the topping is golden brown and the fruit filling is bubbling and appears thickened. You should see some syrupy juices seeping around the edges. If the topping starts to brown too quickly, you can loosely tent the pan with aluminum foil.
5. Cool and Cut: Once baked, remove the pan from the oven and let the bars cool completely on a wire rack. This is a crucial step! The filling needs time to set properly. If you try to cut them while they are warm, they will likely fall apart. For clean cuts, refrigerate the cooled bars for at least 2-3 hours, or even overnight. Once chilled, use the parchment paper overhang to lift the entire slab out of the pan. Place it on a cutting board and cut into desired bar shapes using a sharp knife. Enjoy these delightful spring bars!
Conclusion:
There you have it – a collection of stunning spring desserts designed to truly impress your guests! These recipes are wonderful because they embrace the fresh, vibrant flavors of the season, offering a delightful balance of sweetness and lightness. From delicate fruit tarts to elegantly layered mousses, each creation is a visual and culinary masterpiece, perfect for any spring gathering, be it a brunch, an Easter celebration, or a simple al fresco dinner. Don’t be afraid to experiment! You can easily adapt these desserts to your favorite seasonal fruits. For example, swap the berries in the lemon ricotta cake for ripe peaches or apricots. Consider adding a sprinkle of edible flowers for an extra touch of spring magic. I wholeheartedly encourage you to dive in and try these recipes. They are guaranteed to bring smiles and exclamations of delight, making your next event truly unforgettable.
Frequently Asked Questions:
Can I make these desserts ahead of time?
Many of these stunning spring desserts are perfect for making ahead. Cakes and tarts can often be baked a day in advance and assembled or decorated closer to serving time. Mousses and parfaits benefit greatly from chilling overnight, allowing their flavors to meld beautifully. For anything with fresh fruit that might brown, like sliced strawberries, it’s best to add them just before serving.
What if I don’t have all the specific ingredients?
Don’t worry! Most of these recipes are quite forgiving. For instance, if a recipe calls for a specific berry, you can often substitute with other seasonal berries like raspberries, blueberries, or even a mix. If you’re out of a particular extract, a similar flavor can often be used, or you might even omit it if it’s not a dominant flavor. Always taste and adjust sweetness as needed.
Stunning Spring Desserts to Awe Your Guests!
Impress your guests with these vibrant and refreshing spring-inspired desserts, perfect for any special occasion.
Ingredients
-
1 cup fresh strawberries, hulled and sliced
-
1/2 cup fresh raspberries
-
1/4 cup granulated sugar
-
2 tablespoons fresh lemon juice
-
1/2 teaspoon vanilla extract
-
1 cup heavy cream
-
1/4 cup powdered sugar
-
Mint sprigs for garnish
Instructions
-
Step 1
In a medium bowl, combine the sliced strawberries, raspberries, granulated sugar, and lemon juice. Gently stir to combine. -
Step 2
Let the fruit mixture macerate at room temperature for about 15-20 minutes, allowing the juices to release and the sugar to dissolve. -
Step 3
While the fruit is macerating, whip the heavy cream and powdered sugar in a separate bowl until stiff peaks form. Stir in the vanilla extract. -
Step 4
To assemble, spoon a portion of the macerated fruit mixture into individual serving glasses or bowls. -
Step 5
Top the fruit with a generous dollop of whipped cream. -
Step 6
Garnish with fresh mint sprigs before serving.
Important Information
Nutrition Facts (Per Serving)
It is important to consider this information as approximate and not to use it as definitive health advice.
Allergy Information
Please check ingredients for potential allergens and consult a health professional if in doubt.