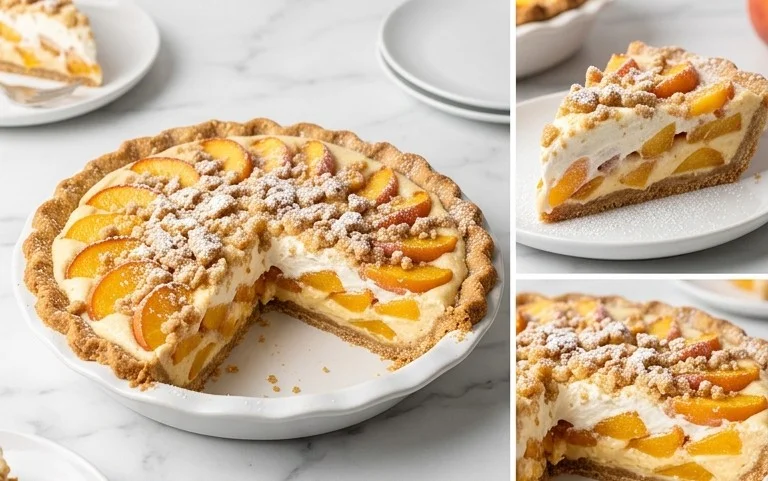
Chocolate Chip Cookie Cheesecake-Decadent Dream
Chocolate Chip Cookie Bottomed Cheesecake. Oh, that’s a mouthful, isn’t it? And a delicious one at that! If you’re like me, the mere mention of a perfectly creamy cheesecake sends shivers of anticnon-alcoholic ipation down your spine. But what if we could elevate that already divine dessert? Imagin extracte the comforting chegrape juicess of a warm chocolate chip cookie, transformed into the base for a luscious, decadent cheesecake. This isn’t just a dessert; it’s a delightful dance between two beloved classics. We love cheesecake for its velvety texture and rich flavor, and chocolate chip cookies for their sweet, gooey charm. The magic of a chocolate chip cookie bottomed cheesecake lies in this unexpected but utterly harmonious union, where the familiar comfort of a cookie meets the sophisticated indulgence of cheesecake. It’s a guaranteed crowd-pleaser, a showstopper that will have everyone beggin extractg for the recipe.
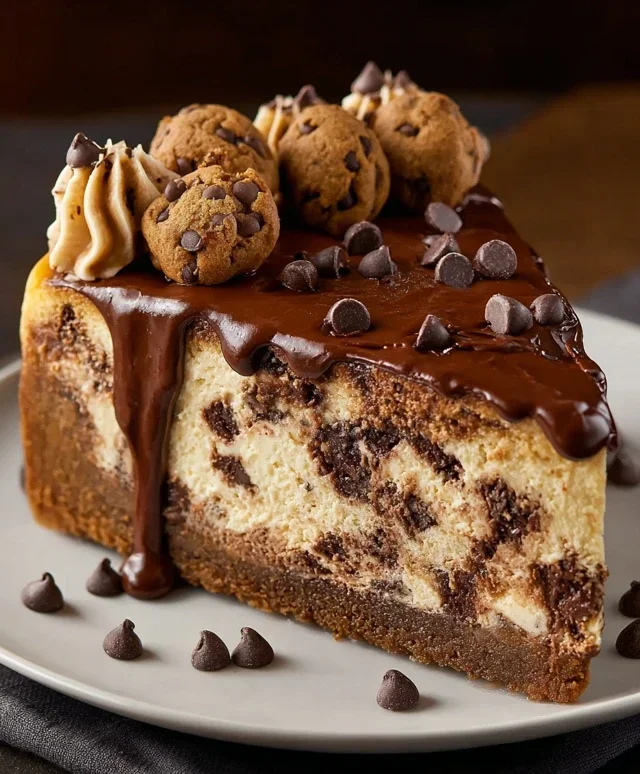
Chocolate Chip Cookie Bottomed Cheesecake
Get ready to indulge in a dessert that’s truly the best of both worlds! This Chocolate Chip Cookie Bottomed Cheesecake is an absolute dream for anyone who loves the rich, creamy texture of cheesecake and the irresistible chegrape juicess of a classic chocolate chip cookie. Forget a grabeef ham cracker crust; we’re elevating things with a thick, decadent layer of cookie dough baked right into the base of your cheesecake. Imagin extracte sinking your fork through a tender, slightly crisp cookie layer, only to discover a velvety smooth, perfectly baked cheesecake filling infused with even more chocolatey goodness. It’s a showstopper for any occasion, and surprisingly achievable in your own kitchen.
Ingredients:
Cooking Instructions:
Let’s get baking! This recipe involves a few stages, but each one is straightforward and leads you closer to that heavenly dessert.
Preparing the Chocolate Chip Cookie Base
The foundation of our magnificent cheesecake is a hearty chocolate chip cookie dough. We’re not just making a thin layer here; this is a substantial, delicious cookie base that will hold up to the rich cheesecake filling.
1. First, preheat your oven to 175°C (350°F). This initial preheating is crucial for ensuring even baking throughout the process. Grease and flour a 23cm (9-inch) springform pan. The springform pan is essential here because it allows you to easily release the cheesecake without damagin extractg its beautiful form once it’s chilled. A good greasing and flouring will prevent sticking.
2. In a large mixing bowl, cream together the softened unsalted butter, light brown sugar, and 39g of sugar until the mixture is light and fluffy. This creaming process incorporates air, which contributes to the texture of the cookie base. You can use an electric mixer for this, or a sturdy whisk and some elbow grease. Beat until you don’t see any large lumps of butter and the mixture is a pnon-alcoholic ale, creamy color.
3. Next, beat in the egg and 1 1/2 tsp of vanilla extract until well combined. Scrape down the sides of the bowl to ensure everything is incorporated. The vanilla extract adds a wonderful depth of flavor that complements the chocolate chips perfectly.
4. In a separate medium bowl, whisk together the all-purpose flour, baking soda, baking powder, and salt. This dry ingredient mixture ensures that the leavening agents are evenly distributed, leading to a consistent rise and texture.
5. Gradually add the dry ingredients to the wet ingredients, mixing on low speed (or by hand with a spatula) until just combined. Be careful not to overmix the dough, as this can lead to tough cookies. Overmixing develops the gluten in the flour, which is not what we want for a tender cookie crust.
6. Finally, gently fold in the 211g of semi-sweet chocolate chips. Stir them in just until they are evenly distributed throughout the dough. Now, press this delicious cookie dough evenly into the bottom of your prepared springform pan. Make sure it’s a uniform layer, reaching all the way to the edges. You can use the bottom of a measuring cup or your hands to achieve a smooth, even surface. This layer will be partially baked before the cheesecake filling is added, ensuring it cooks through properly.
Baking the Cookie Base
We need to give the cookie dough a head start before adding the cheesecake filling.
7. Bake the cookie base for 10-12 minutes, or until it’s lightly golden around the edges and just begin extractning to set. It will look slightly underbaked in the center, which is exactly what we want, as it will continue to bake with the cheesecake. Once baked, carefully remove it from the oven and let it cool slightly while you prepare the cheesecake filling. Don’t turn off the oven just yet; we’ll need it again.
Making the Velvety Cheesecake Filling
Now for the star of the show: the creamy, dreamy cheesecake filling. We’re incorporating cocoa powder and melted chocolate for an extra layer of decadence.
8. In a large bowl, beat the softened cream cheese until it’s completely smooth and creamy. It’s crucial that the cream cheese is at room temperature to avoid lumps. If your cream cheese is cold, your filling will be lumpy, no matter how much you beat it. Beat it on medium speed until there are no traces of lumps.
9. Gradually add the 104g of sugar and the natural unsweetened cocoa powder to the cream cheese, beating until well combined and smooth. The cocoa powder will give our cheesecake a beautiful, deep chocolate flavor and a rich color.
10. Beat in 1 tsp of vanilla extract until just combined. Then, incorporate the 42g of melted semi-sweet chocolate chips. Make sure the melted chocolate has cooled slightly before adding it to the cream cheese mixture, otherwise, it could cause the cream cheese to seize up. Mix until the chocolate is fully incorporated, creating a beautiful swirl of chocolate throughout the filling.
Assembling and Baking the Cheesecake
It’s time to bring our cookie base and cheesecake filling together.
11. Gently pour the cheesecake filling over the partially baked cookie base in the springform pan. Smooth the top with a spatula to ensure an even surface.
12. Now, we’re going to bake this beauty. This is where we want to ensure the cheesecake cooks evenly and doesn’t crack. Place the springform pan in a larger roasting pan. Carefully pour hot water into the roasting pan, ensuring it comes about halfway up the sides of the springform pan. This water bath, or bain-marie, creates a humid environment in the oven, which helps the cheesecake to bake gently and prevents the top from cracking.
13. Bake in the preheated oven for 50-60 minutes, or until the edges of the cheesecake are set but the center still has a slight wobble. The wobble is key – it indicates the cheesecake is cooked but will continue to set as it cools. Overbaking will result in a dry, cracked cheesecake.
14. Once baked, turn off the oven, but leave the cheesecake inside with the oven door slightly ajar for another hour. This gradual cooling process further prevents cracking. After the hour, remove the cheesecake from the water bath and the roasting pan, and let it cool completely on a wire rack.
15. Once completely cool, cover the cheesecake and refrigerate for at least 6 hours, or preferably overnight. Chilling is essential for the cheesecake to set properly and for the flavors to meld. The longer it chills, the firmer and more delicious it will be.
16. To serve, carefully run a thin knife around the edge of the springform pan before releasing the sides. Slice and enjoy this incredible fusion of cookie and cheesecake!
Conclusion:
So there you have it – your ultimate guide to creating the most decadent Chocolate Chip Cookie Bottomed Cheesecake! This recipe truly bridges the gap between two beloved desserts, offering the creamy, dreamy texture of cheesecake with the irresistible, buttery crunch of a perfect chocolate chip cookie. It’s a guaranteed showstopper for any occasion, whether it’s a birthday, a holiday gathering, or simply a treat for yourself after a long week. I’ve found that serving this masterpiece slightly chilled allows the flavors to meld beautifully, and a simple dollop of whipped cream or a sprinkle of extra chocolate chips elevates it even further.
Don’t be afraid to experiment with variations! You could try using different types of chocolate chips, like dark chocolate or white chocolate, or even adding a handful of chopped nuts to the cookie crust. For an extra layer of indulgence, a drizzle of caramel sauce or a raspberry coulis would be absolutely divine. I truly encourage you to give this Chocolate Chip Cookie Bottomed Cheesecake a try; the combination is pure bliss, and the joy of creating and sharing it is immense. You won’t regret it!
Frequently Asked Questions:
Why is the cookie crust so important for this cheesecake?
The cookie crust is absolutely crucial as it provides a delicious textural contrast to the smooth, creamy cheesecake filling. It also infuses the entire dessert with that comforting, familiar flavor of a classic chocolate chip cookie. It’s what makes this recipe truly unique and utterly irresistible.
Can I make this cheesecake ahead of time?
Absolutely! In fact, making your Chocolate Chip Cookie Bottomed Cheesecake a day in advance is highly recommended. This allows the cheesecake to set fully and the flavors to meld, resulting in an even more delicious final product. Just make sure to store it, covered, in the refrigerator.
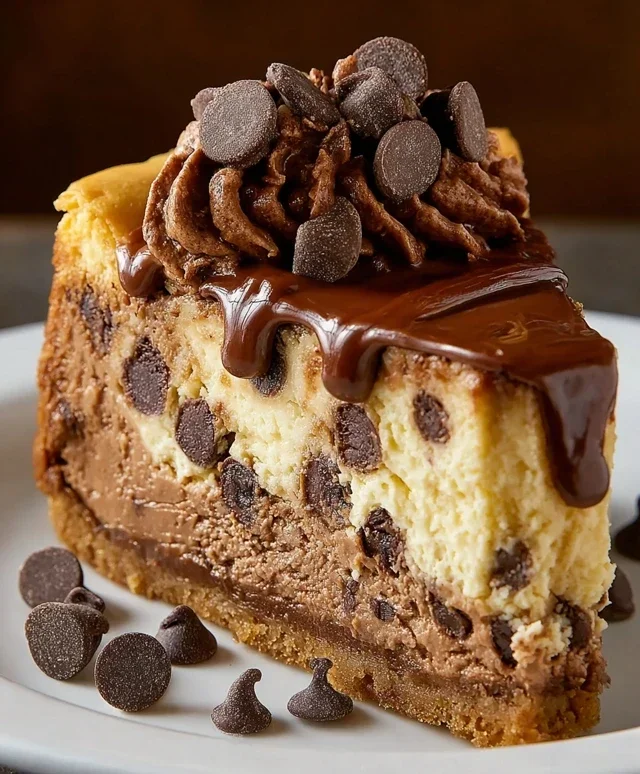
Chocolate Chip Cookie Bottomed Cheesecake
A decadent cheesecake with a chewy chocolate chip cookie crust, topped with a rich, chocolatey cheesecake filling.
Ingredients
-
112g unsalted butter, room temperature
-
72g light brown sugar
-
39g sugar
-
1 egg
-
1 1/2 tsp vanilla extract
-
195g all-purpose flour
-
3/4 tsp baking soda
-
1/4 tsp baking powder
-
1/4 tsp salt
-
211g semi-sweet chocolate chips
-
565g cream cheese, room temperature
-
104g sugar
-
35g natural unsweetened cocoa powder
-
1 tsp vanilla extract
-
42g semi-sweet chocolate chips, melted
Instructions
-
Step 1
Preheat oven to 350°F (175°C). Grease a 9-inch springform pan. -
Step 2
For the cookie crust: In a medium bowl, cream together softened butter, light brown sugar, and 39g sugar until light and fluffy. -
Step 3
Beat in the egg and 1 1/2 tsp vanilla extract. In a separate bowl, whisk together flour, baking soda, baking powder, and salt. Gradually add dry ingredients to wet ingredients until just combined. Stir in 211g chocolate chips. -
Step 4
Press cookie dough evenly into the bottom of the prepared springform pan. Bake for 10-12 minutes, or until lightly golden. -
Step 5
For the cheesecake filling: In a large bowl, beat cream cheese until smooth. Gradually beat in 104g sugar until well combined. -
Step 6
Beat in cocoa powder and 1 tsp vanilla extract until smooth. Beat in the melted 42g chocolate chips until incorporated. -
Step 7
Pour the cheesecake filling over the baked cookie crust. Smooth the top. -
Step 8
Bake for 50-60 minutes, or until the edges are set and the center is slightly jiggly. Turn off the oven, crack the door open, and let the cheesecake cool in the oven for 1 hour. -
Step 9
Remove from oven and let cool completely on a wire rack. Chill in the refrigerator for at least 4 hours before serving.
Important Information
Nutrition Facts (Per Serving)
It is important to consider this information as approximate and not to use it as definitive health advice.
Allergy Information
Please check ingredients for potential allergens and consult a health professional if in doubt.