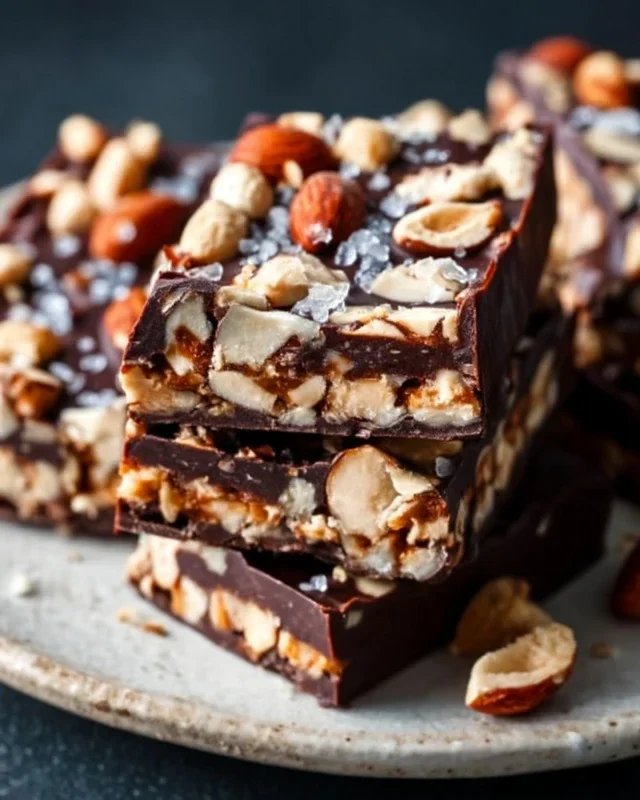
Dark Chocolate Sea Salt Nut Bars-Easy Recipe
Dark Chocolate and Sea Salt Nut Bars are more than just a treat; they’re a symphony of textures and flavors that I simply can’t get enough of. If you’re anything like me, you crave those moments of pure, unadulterated indulgence, and these bars deliver precisely that. They’re the perfect antidote to a long day, a little pick-me-up that feels both sophisticated and deeply satisfying. What makes these Dark Chocolate and Sea Salt Nut Bars so special is the exquisite balance. The rich, slightly bitter depth of the dark chocolate perfectly complements the satisfying crunch of the nuts, while the judicious sprinkle of sea salt cuts through the sweetness, awakening every taste bud. It’s this delightful interplay that elevates them from a simple snack to a truly memorable confection. Prepare yourself for a flavor explosion that will have you reaching for another (or perhaps two) before you even realize it!
Ingredients:
Crafting Your Own Decadent Dark Chocolate and Sea Salt Nut Bars
There’s something incredibly satisfying about creating your own homemade treats, and these Dark Chocolate and Sea Salt Nut Bars are no exception. They strike a perfect balance between sweet, salty, nutty, and chocolatey, making them an irresistible snack for any time of day. Whether you’re looking for a healthy-ish indulgence, a pick-me-up after a long day, or a crowd-pleasing dessert for your next gathering, these bars are sure to impress. The beauty of this recipe lies in its simplicity and versatility; you can easily adapt it to your favorite nuts and even adjust the sweetness to your liking. Let’s dive into creating these delicious bars.
Preparing Your Nutty Foundation
The first step in creating these delightful bars is to prepare your nuts. For this recipe, we’re using a blend of cashews, peanuts, and almonds, totaling 2 1/2 cups. However, feel free to experiment with your favorites! Walnuts, pecans, or even macadamia nuts would be wonderful additions. The key is to have unsalted nuts so you have full control over the saltiness. I like to give my nuts a quick toast before incorporating them into the bars. This step isn’t strictly necessary, but it really intensifies their flavor and adds a lovely crunch. To toast them, simply spread them out on a baking sheet and bake in a preheated oven at 350°F (175°C) for about 8-10 minutes, or until fragrant and lightly golden. Keep a close eye on them, as nuts can burn quickly. Once toasted, let them cool completely.
Binding and Sweetening the Mixture
Now that our nuts are prepped and cooled, it’s time to bring everything together. In a large bowl, combine your cooled nuts with the puffed rice. The puffed rice adds a delightful lightness and crispiness to the bars, preventing them from being too dense. Next, we’ll create the binding syrup. In a small saucepan over medium heat, gently warm the brown rice syrup. You don’t want it to boil vigorously, just to become fluid and easier to pour. Once warmed, stir in the vanilla extract and the 1/2 teaspoon of sea salt. This combination will not only sweeten the bars but also enhance the nutty flavors and provide that essential salty counterpoint to the chocolate.
Combining and Pressing the Bars
Pour the warmed syrup mixture over the nuts and puffed rice. Stir everything thoroughly until all the dry ingredients are well coated. This is where patience comes in. You want to ensure every nut and piece of puffed rice is touched by the sticky syrup. It might seem a little challengin extractg to get everything evenly coated at first, but keep stirring! Once everything is well combined, transfer the mixture to a baking pan lined with parchment paper. I recommend using a standard 8×8 inch pan, which will give you nice, thick bars. Press the mixture down firmly and evenly into the pan. You can use the back of a spoon, a spatula, or even your hands (lightly greased with a little coconut oil to prevent sticking) to compact the mixture. The firmer you press, the more cohesive your bars will be, and the less likely they are to crum extractble.
The Chocolatey Topping
This is arguably the best part! In a small microwave-safe bowl, combine the dark chocolate chips and the coconut oil. Microwave in 30-second intervals, stirring well after each interval, until the chocolate is completely melted and smooth. The coconut oil helps the chocolate melt more evenly and gives it a lovely glossy finish. Stir it until there are no lumps of chocolate remaining. Once smooth, pour this melted chocolate over the pressed nut mixture in the pan. Spread it out evenly using an offset spatula or the back of a spoon to cover the entire surface.
Chilling and Finishing Touches
Now comes the crucial chilling phase. Place the pan in the refrigerator for at least 2-3 hours, or until the chocolate is completely set. This will allow the bars to firm up and become sliceable. Once chilled, carefully lift the parchment paper out of the pan, bringin extractg the entire slab of bars with it. You can then place it on a cutting board. If you’re using flaky salt for topping, sprinkle it over the set chocolate layer now. The flaky salt adds a wonderful textural contrast and a burst of salty flavor that complements the dark chocolate perfectly.
Slicing and Enjoying
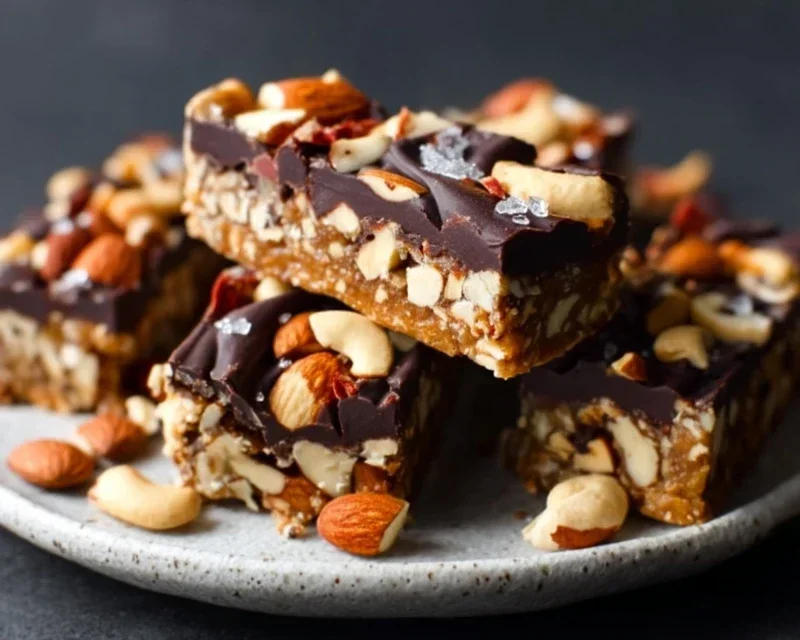
Using a sharp knife, cut the slab into your desired bar size. I usually aim for about 12-16 bars, depending on how generous I’m feeling. For cleaner cuts, you can warm your knife slightly under hot water and wipe it dry before each slice, especially through the chocolate layer. These Dark Chocolate and Sea Salt Nut Bars are best stored in an airtight container in the refrigerator. They’ll keep for about a week, though I doubt they’ll last that long! Enjoy them as a satisfying snack, a sweet treat after a meal, or even a homemade gift. The combination of crunchy nuts, chewy rice, rich dark chocolate, and a hint of sea salt is truly addictive.
Conclusion:
And there you have it – a simple yet incredibly satisfying recipe for Dark Chocolate and Sea Salt Nut Bars! These bars are a true winner because they strike that perfect balance between rich, decadent dark chocolate and the delightful crunch of nuts, all elevated by that hint of flaky sea salt. They’re not just a treat; they’re a wholesome snack that satisfies your sweet cravings without being overly sugary. The beauty of these bars lies in their adaptability. You can customize them to your heart’s content! I love adding a sprinkle of chili flakes for a spicy kick, or a handful of dried cranberries for a touch of tartness.
Enjoy these Dark Chocolate and Sea Salt Nut Bars on the go for a midday energy boost, as a post-workout reward, or even as a thoughtful homemade gift. They are perfect with a cup of coffee or a glass of cold milk. Don’t be afraid to experiment with different nut combinations – almonds, pecans, or even pistachios work beautifully. I truly encourage you to give this recipe a try; I’m confident you’ll find it as addictive and rewarding as I do!
Frequently Asked Questions:
Can I make these bars vegan?
Absolutely! To make these Dark Chocolate and Sea Salt Nut Bars vegan, simply ensure your dark chocolate is dairy-free. Many high-quality dark chocolates are naturally vegan. You can also substitute the butter with a plant-based butter alternative or coconut oil for binding. The nuts and sea salt are already vegan-friendly!
How long do these bars last?
Stored properly in an airtight container at room temperature, these bars should stay fresh for about 5-7 days. For longer storage, you can keep them in the refrigerator, which will extend their shelf life to around 2 weeks. They also freeze wonderfully, so you can make a big batch and enjoy them for weeks to come.
Dark Chocolate and Sea Salt Nut Bars
Chewy and satisfying nut bars with a hint of sea salt, enrobed in rich dark chocolate.
Ingredients
-
2 1/2 cups unsalted nuts of choice (3/4 cup cashews, 3/4 cup peanuts, 1 cup almonds)
-
1/2 cup puffed rice
-
1/4 cup brown rice syrup
-
1 1/2 teaspoon vanilla extract
-
1/2 teaspoon sea salt
-
1 cup dark chocolate chips
-
2 teaspoons coconut oil
-
flaky salt for topping (optional)
Instructions
-
Step 1
Line an 8×8 inch baking pan with parchment paper, leaving an overhang. -
Step 2
In a large bowl, combine the nuts and puffed rice. -
Step 3
In a small saucepan over low heat, warm the brown rice syrup, vanilla extract, and 1/2 teaspoon sea salt until combined and slightly runny. -
Step 4
Pour the warm syrup mixture over the nut and rice mixture. Stir well to coat everything evenly. -
Step 5
Press the mixture firmly into the prepared baking pan. Chill in the refrigerator for at least 30 minutes to set. -
Step 6
Melt the dark chocolate chips and coconut oil together in a microwave-safe bowl in 30-second intervals, stirring in between, until smooth. Alternatively, use a double boiler. -
Step 7
Cut the chilled nut mixture into bars. Dip each bar into the melted chocolate, allowing excess to drip off. Place on a parchment-lined baking sheet. -
Step 8
Immediately sprinkle with flaky salt, if using, before the chocolate sets. -
Step 9
Refrigerate until the chocolate is firm, about 15-20 minutes. Store in an airtight container in the refrigerator.
Important Information
Nutrition Facts (Per Serving)
It is important to consider this information as approximate and not to use it as definitive health advice.
Allergy Information
Please check ingredients for potential allergens and consult a health professional if in doubt.